Workflow
This guide explains how to use the Workflow module within Bookified to automate and customize various business processes related to appointments. It provides step-by-step instructions on creating new workflows, selecting triggers and actions, and customizing filters. The guide also highlights the range of actions available, such as sending emails and SMS notifications. It emphasizes the flexibility and personalization offered by using keywords and provides tips for ensuring compliance. Overall, this guide is a valuable resource for anyone looking to enhance their appointment management and streamline their business processes.
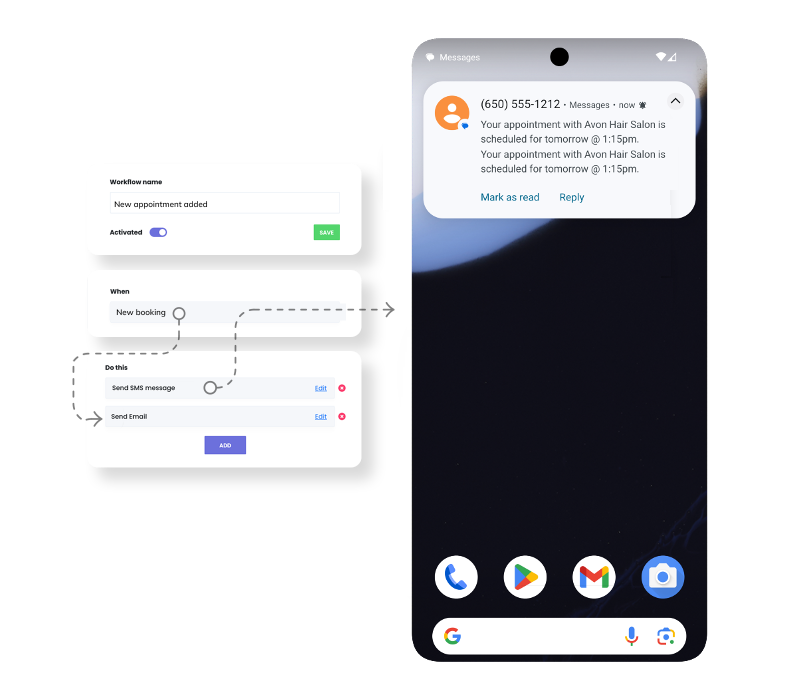
Workflow automation in your appointment management system allows you to streamline and customize various business processes related to appointments. For instance, when an appointment is booked, you can set up the system to automatically send an email confirmation to the customer and a SMS message to the staff or admin. Following the appointment, the system can be programmed to send a survey form to the customer through SMS or email. Moreover, it can automatically change the meeting status to ‘Archived’ after a month has elapsed. These are just a few examples, and there are countless other combinations and workflows that can be created to optimize your business processes and enhance customer and staff experience.
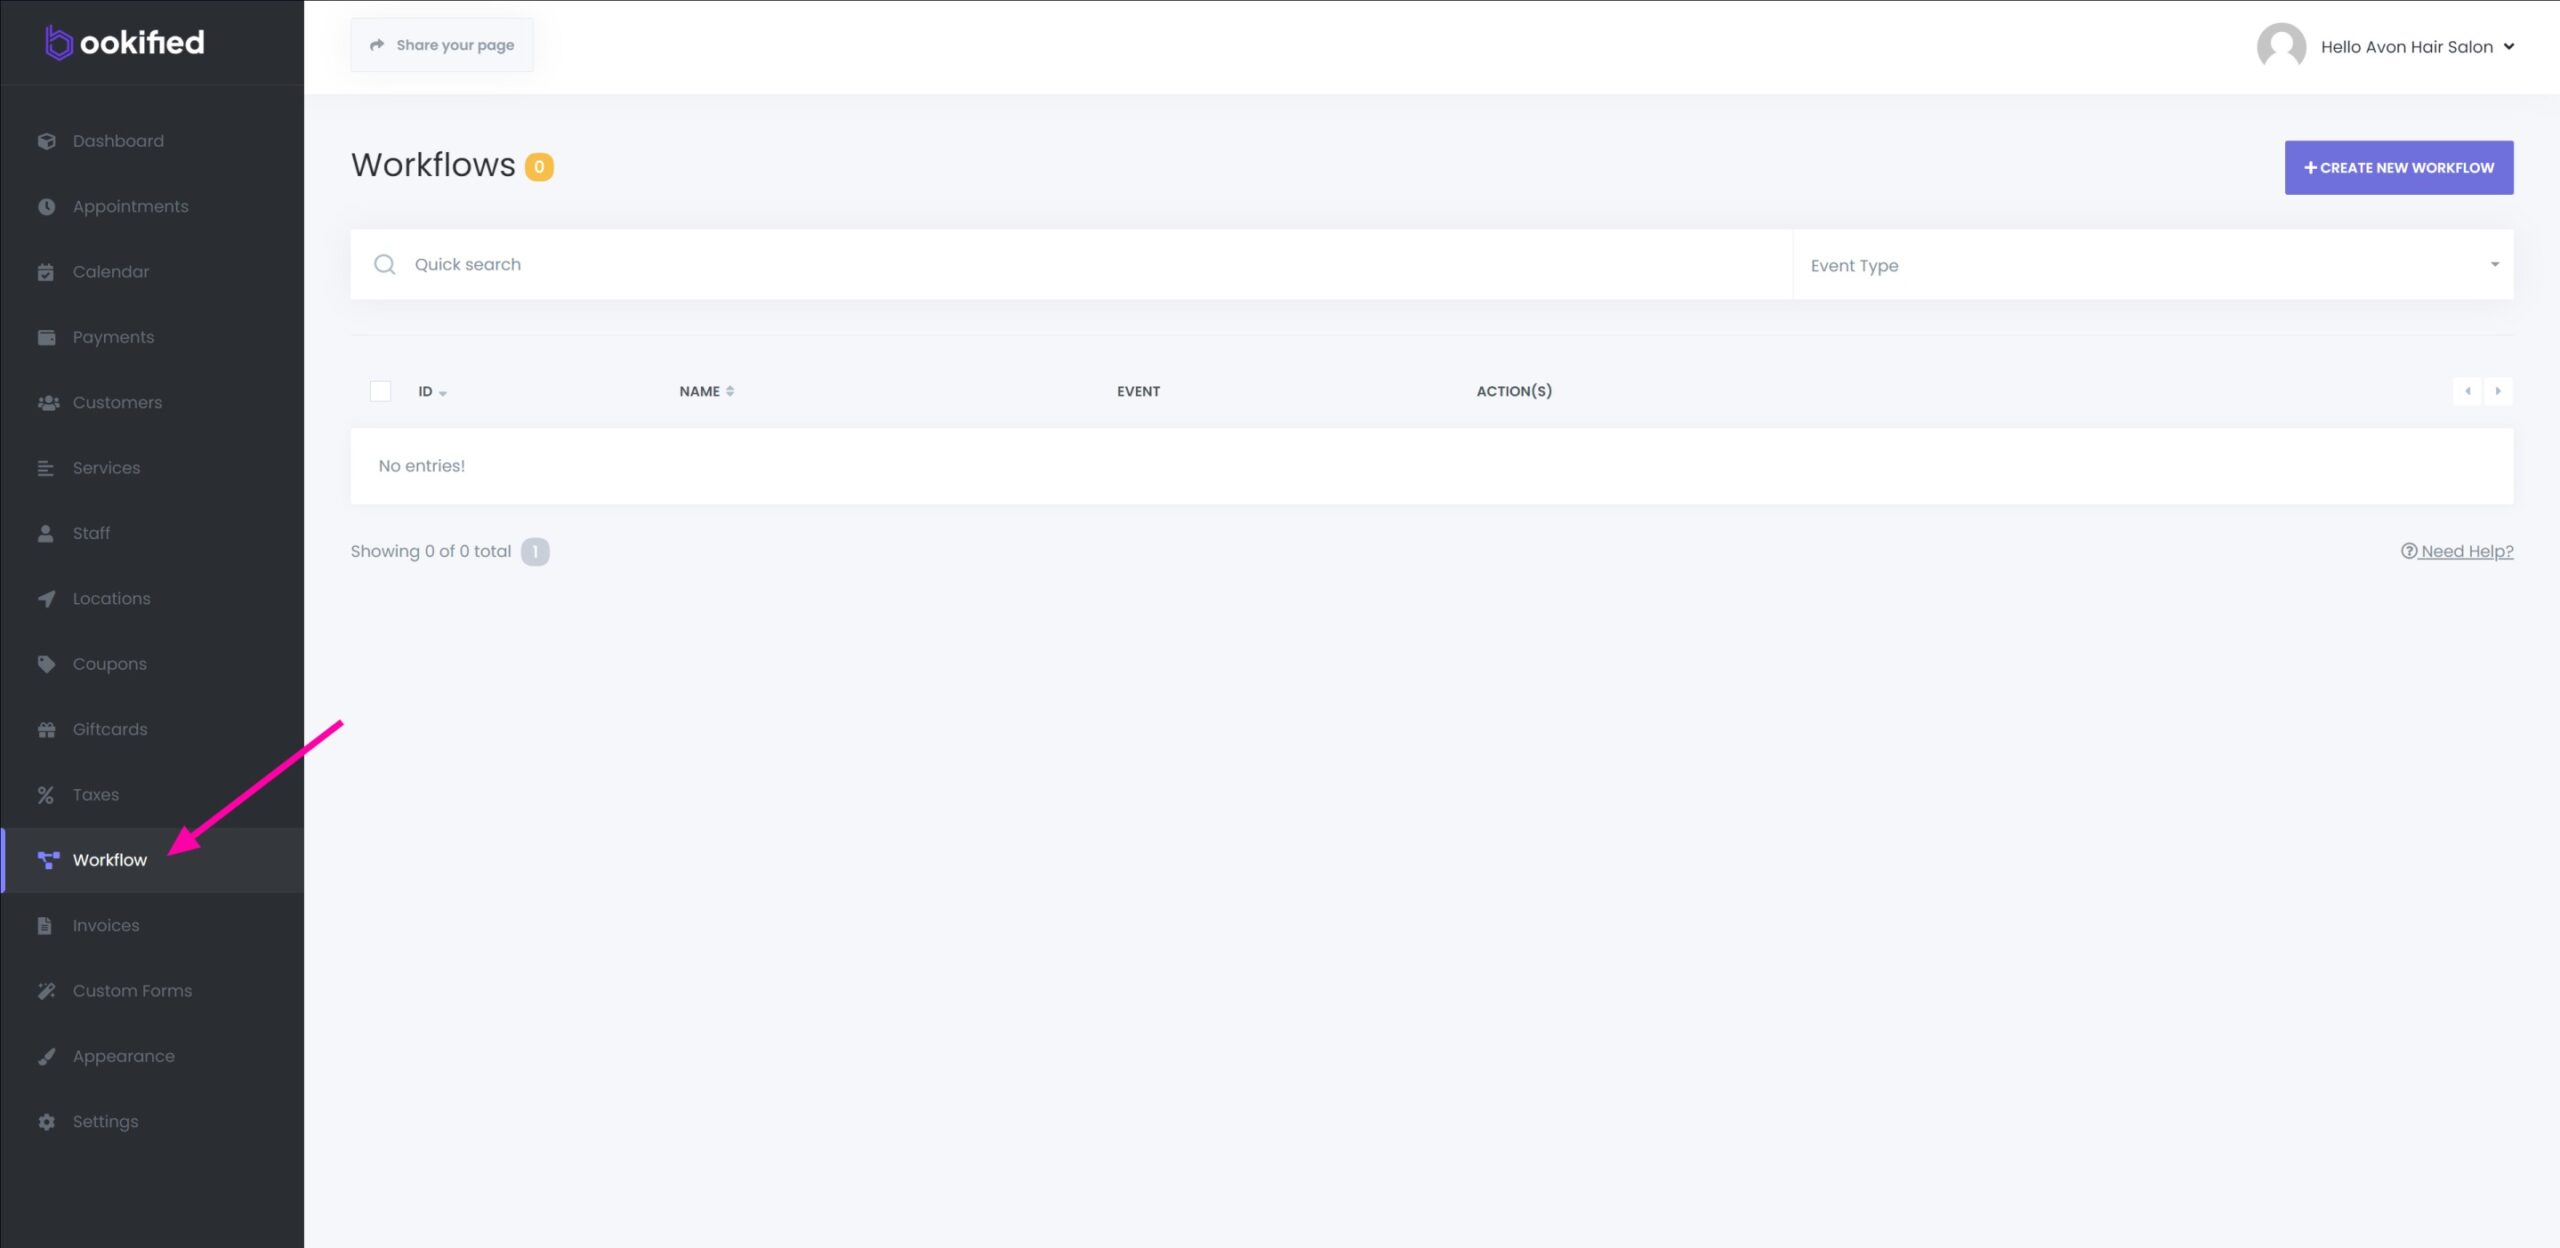
- Navigate to the Workflow menu to see a complete list of workflows (if any exists).
Adding a New Workflow
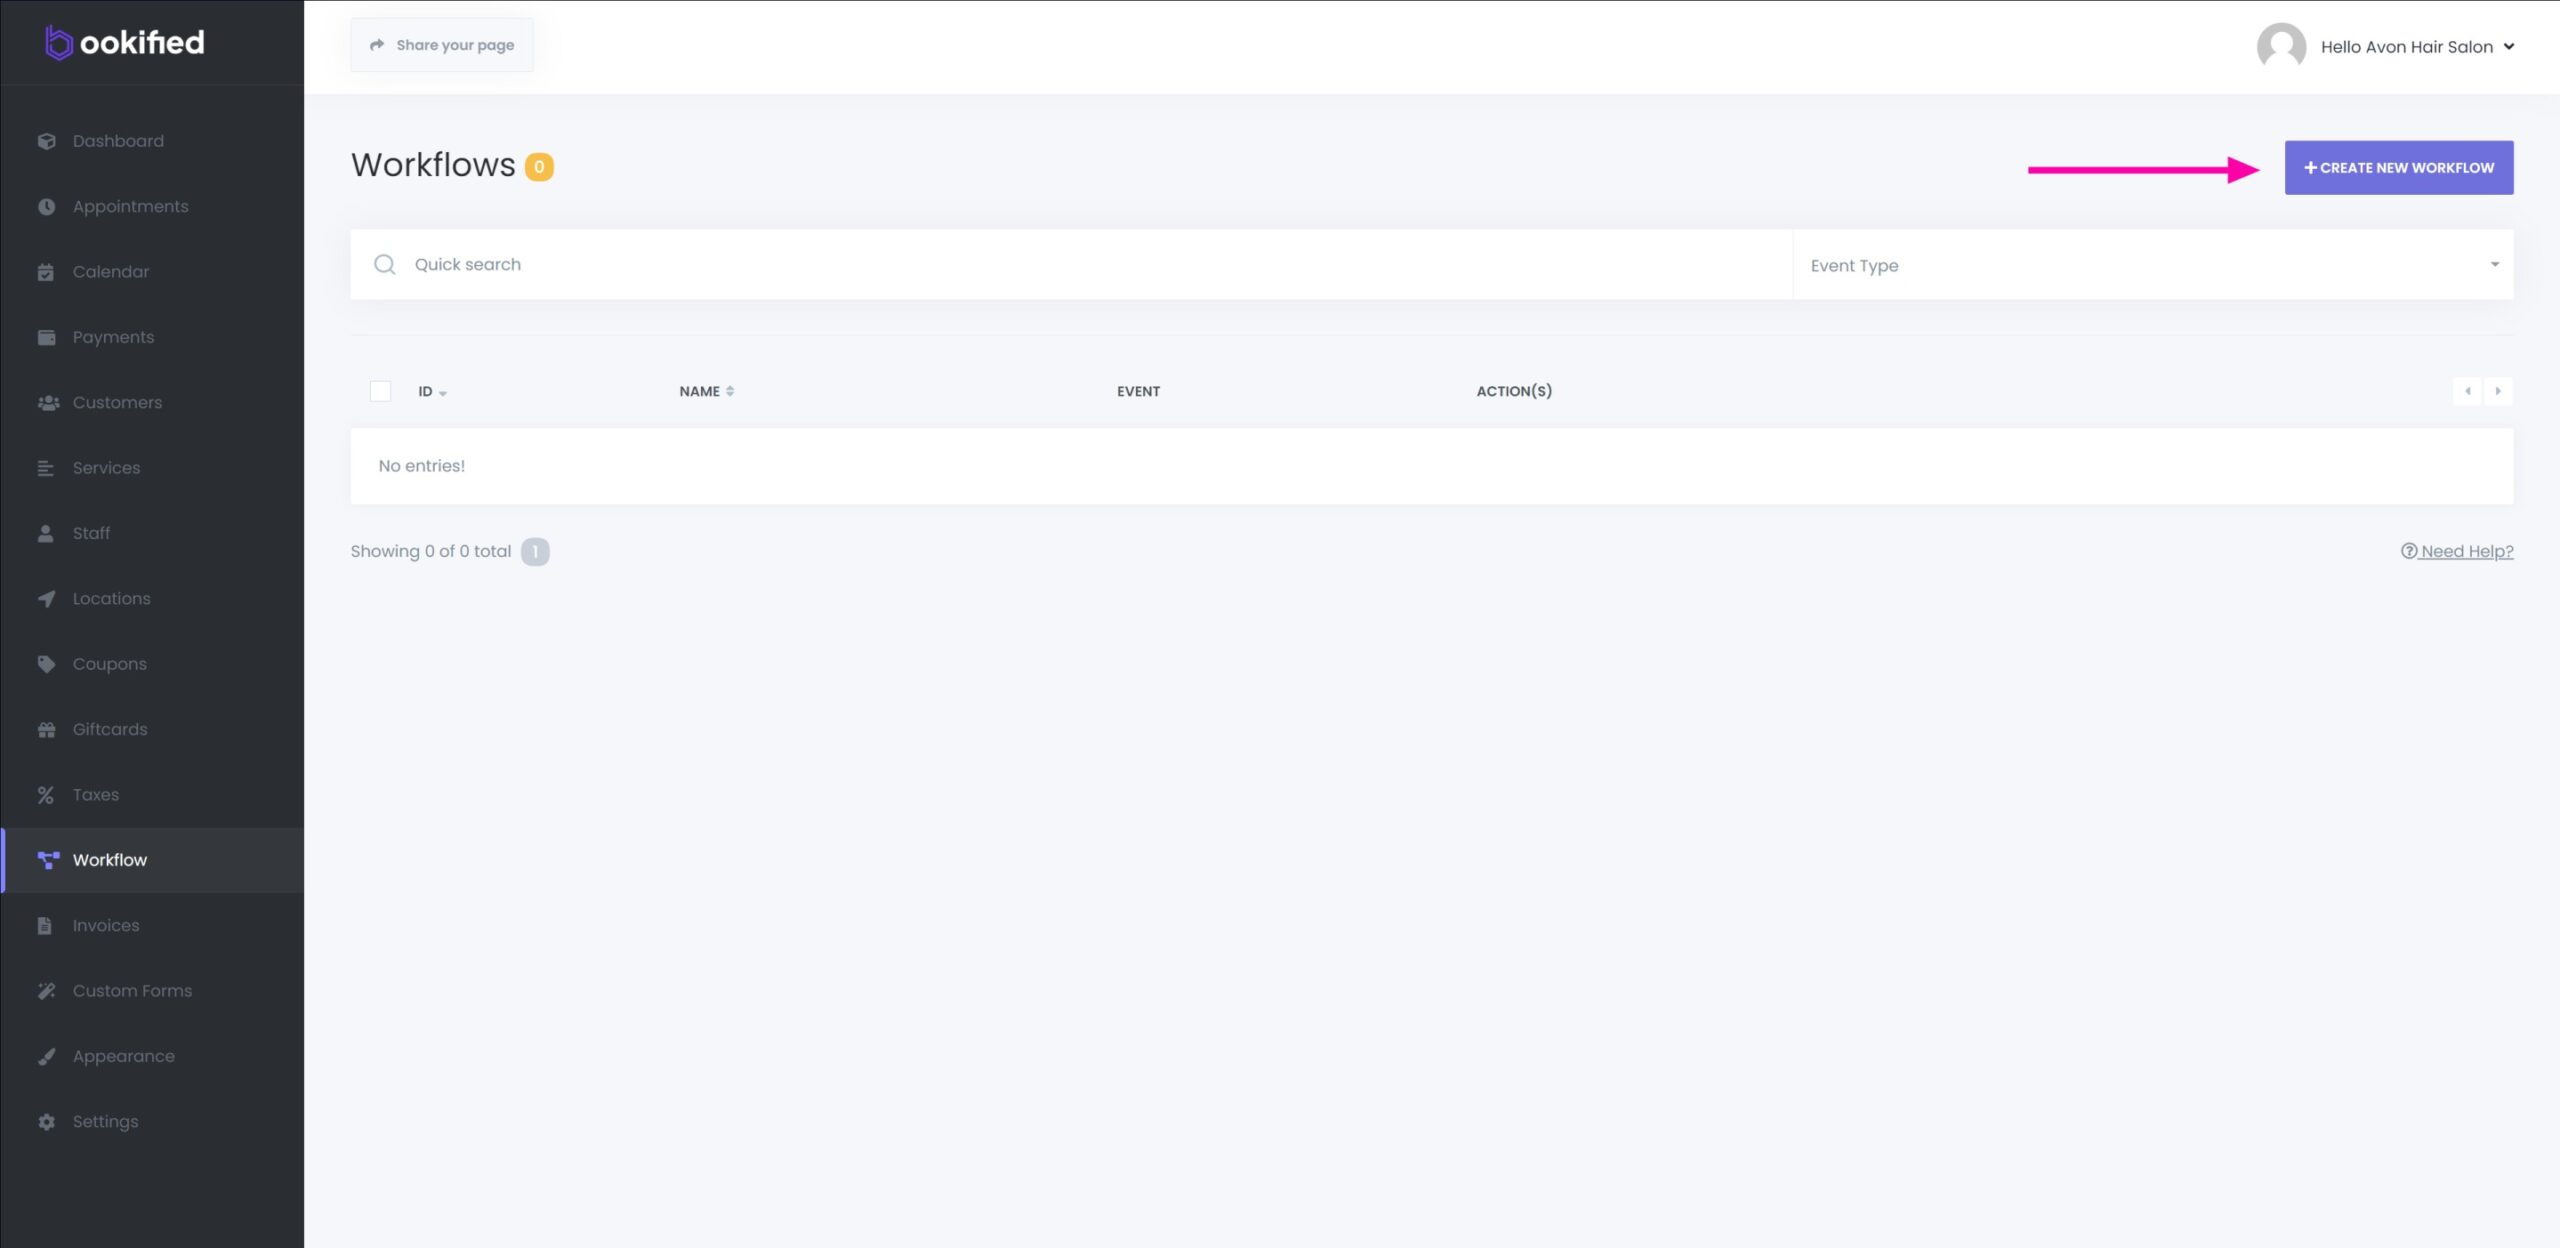
- To initiate a new workflow, simply click on the ‘Create a new workflow’ button. This action will begin the process of setting up your automated workflow sequence.
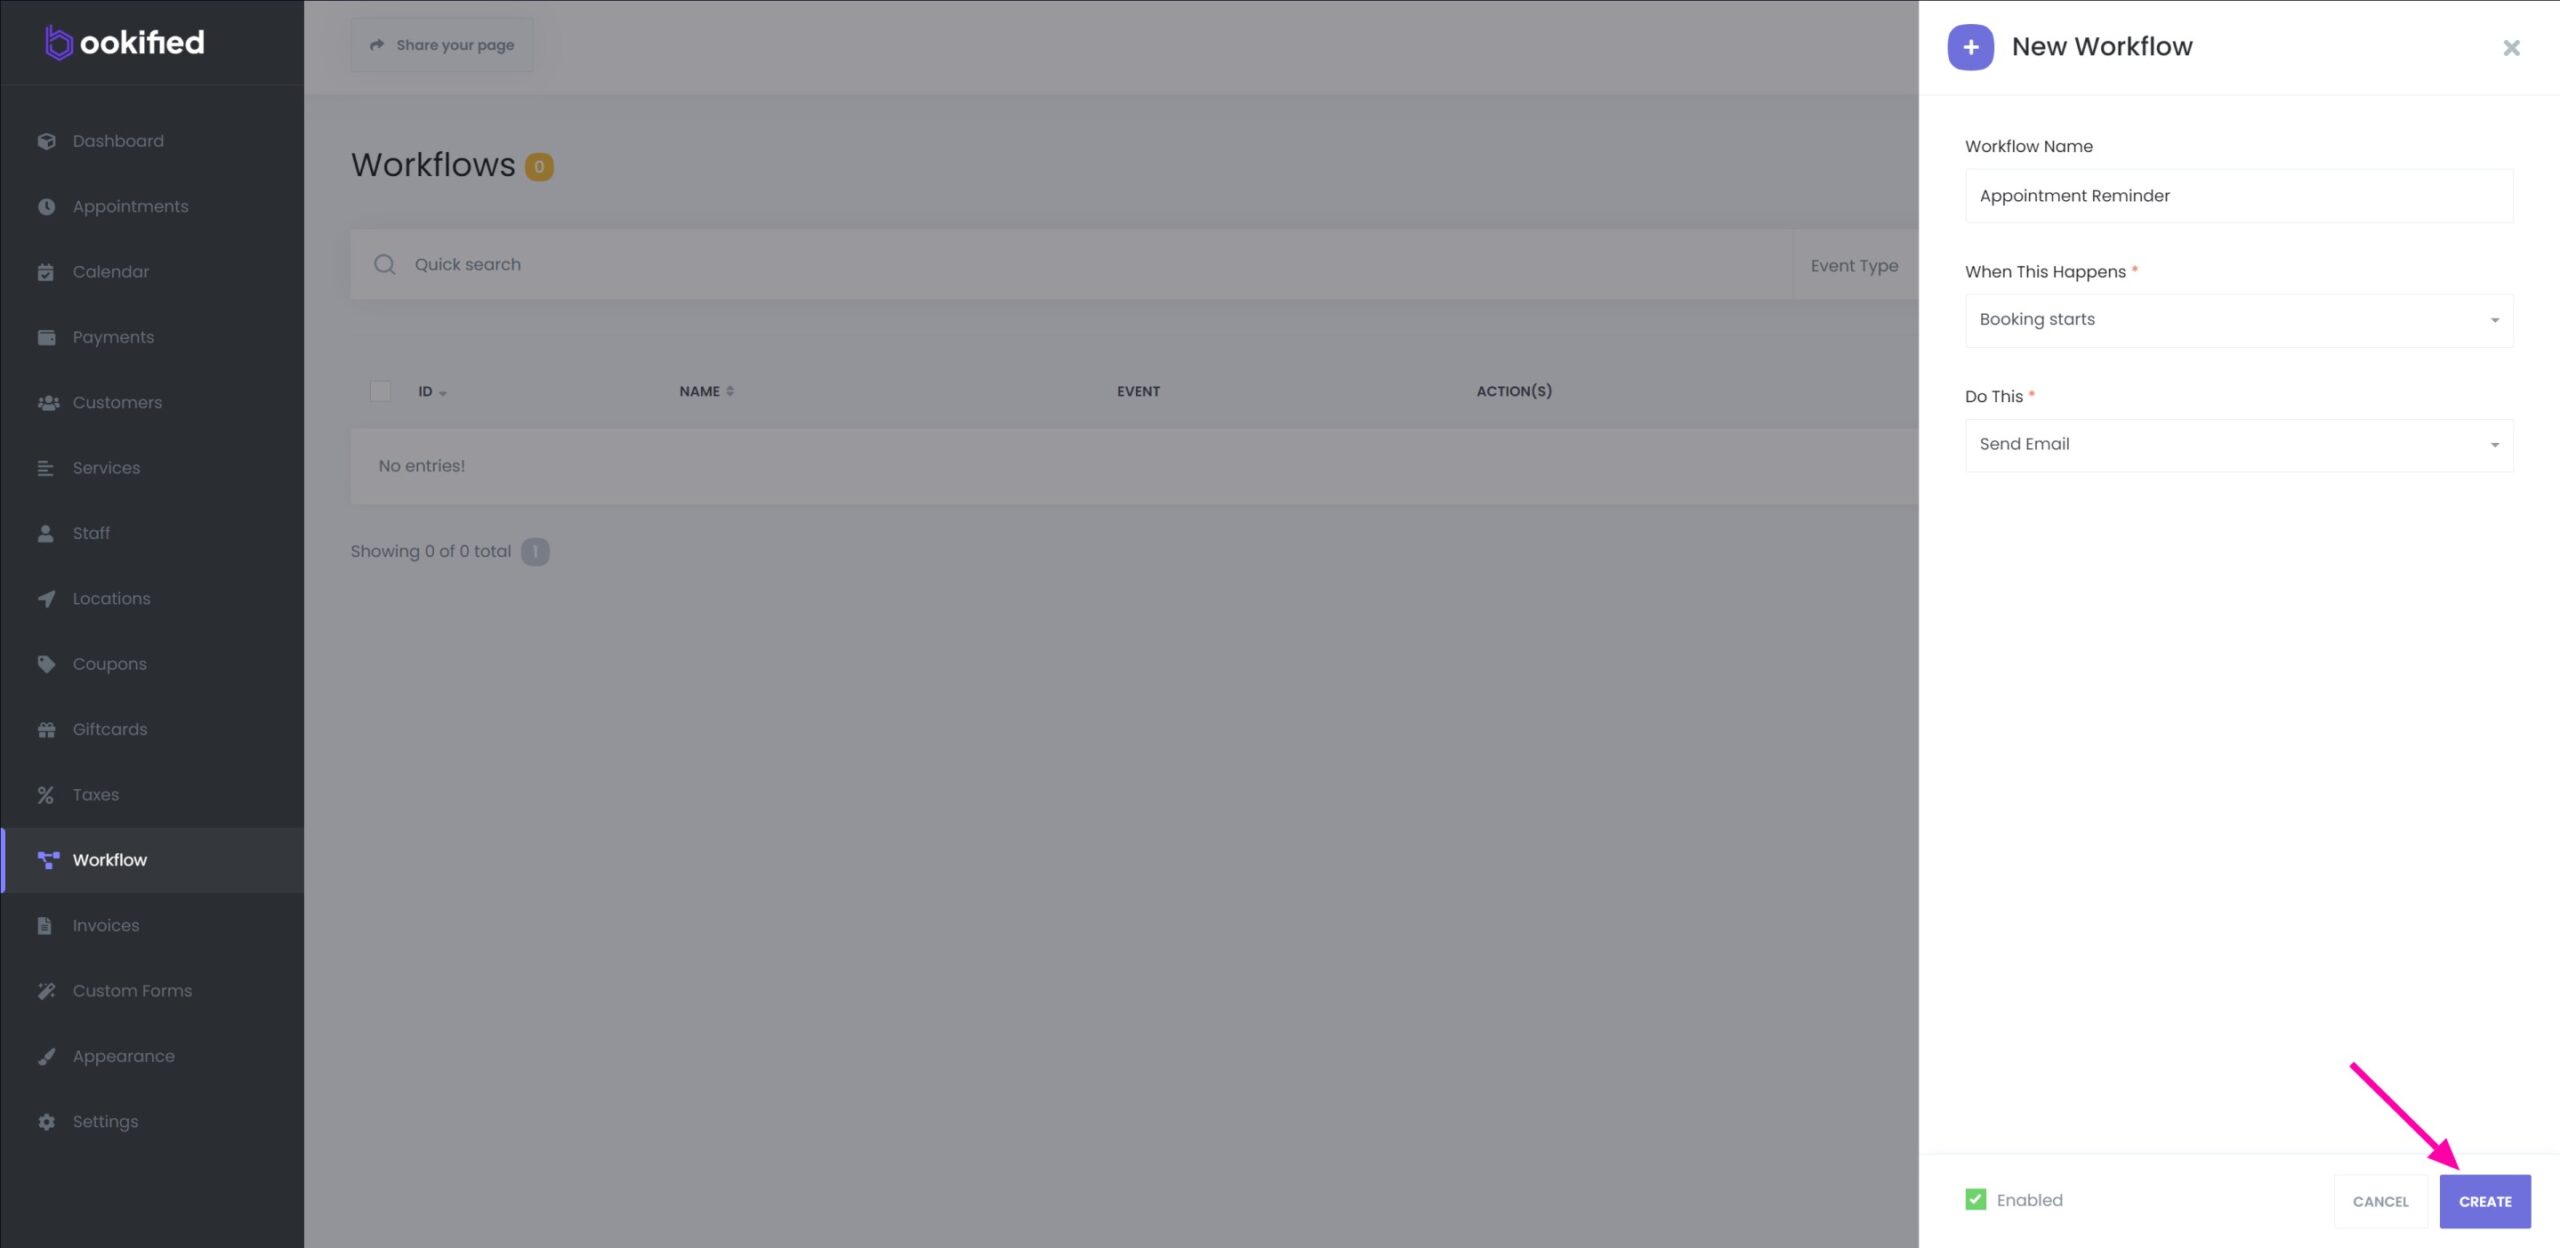
2. A slide-in popup will appear, presenting fields to configure your workflow effectively. These fields include setting the ‘Workflow name’, defining the trigger in the ‘When this happens’ field, and specifying the resulting action in the ‘Do this’ field. This setup allows you to clearly establish what event initiates the workflow and what subsequent action should be taken as a response.
‘WHEN THIS HAPPENS’
New Booking: This trigger activates when a new booking is made. It’s used to initiate workflows related to new appointments scheduled by customers.
Booking Rescheduled: This trigger is activated when an existing booking is rescheduled. It can be used to manage and automate responses to changes in appointment times or dates.
Booking Status Changed: This trigger occurs when the status of a booking changes, for example, from ‘pending’ to ‘confirmed’ or ‘cancelled’. It’s useful for workflows that respond to status updates.
Booking Starts: This trigger is activated when a booking reaches its scheduled start time. It can trigger reminders or other actions that need to occur right at the beginning of an appointment.
Booking Ends: This trigger is used when a booking reaches its scheduled end time. It’s often used for follow-up actions post-appointment, like sending feedback forms or thank-you messages.
Appointment Paid: This trigger activates when a payment is made for an appointment. It can be used for payment confirmation messages or to initiate post-payment processes.
New Customer Created: This trigger occurs when a new customer profile is created in the system. It’s useful for welcoming new clients or initiating onboarding processes.
‘DO THIS’
Set Booking Status: Changes the status of a booking automatically when a trigger is activated, useful for updating booking progress.
Send Email: Automatically sends an email in response to a trigger, for confirmations, reminders, or follow-up communications.
Send an SMS: An SMS message is sent in response to the trigger, providing a direct text communication channel with customers.
3. Once you’re satisfied with the configuration you’ve set up, simply click on the ‘create’ button to finalize and implement your new workflow.
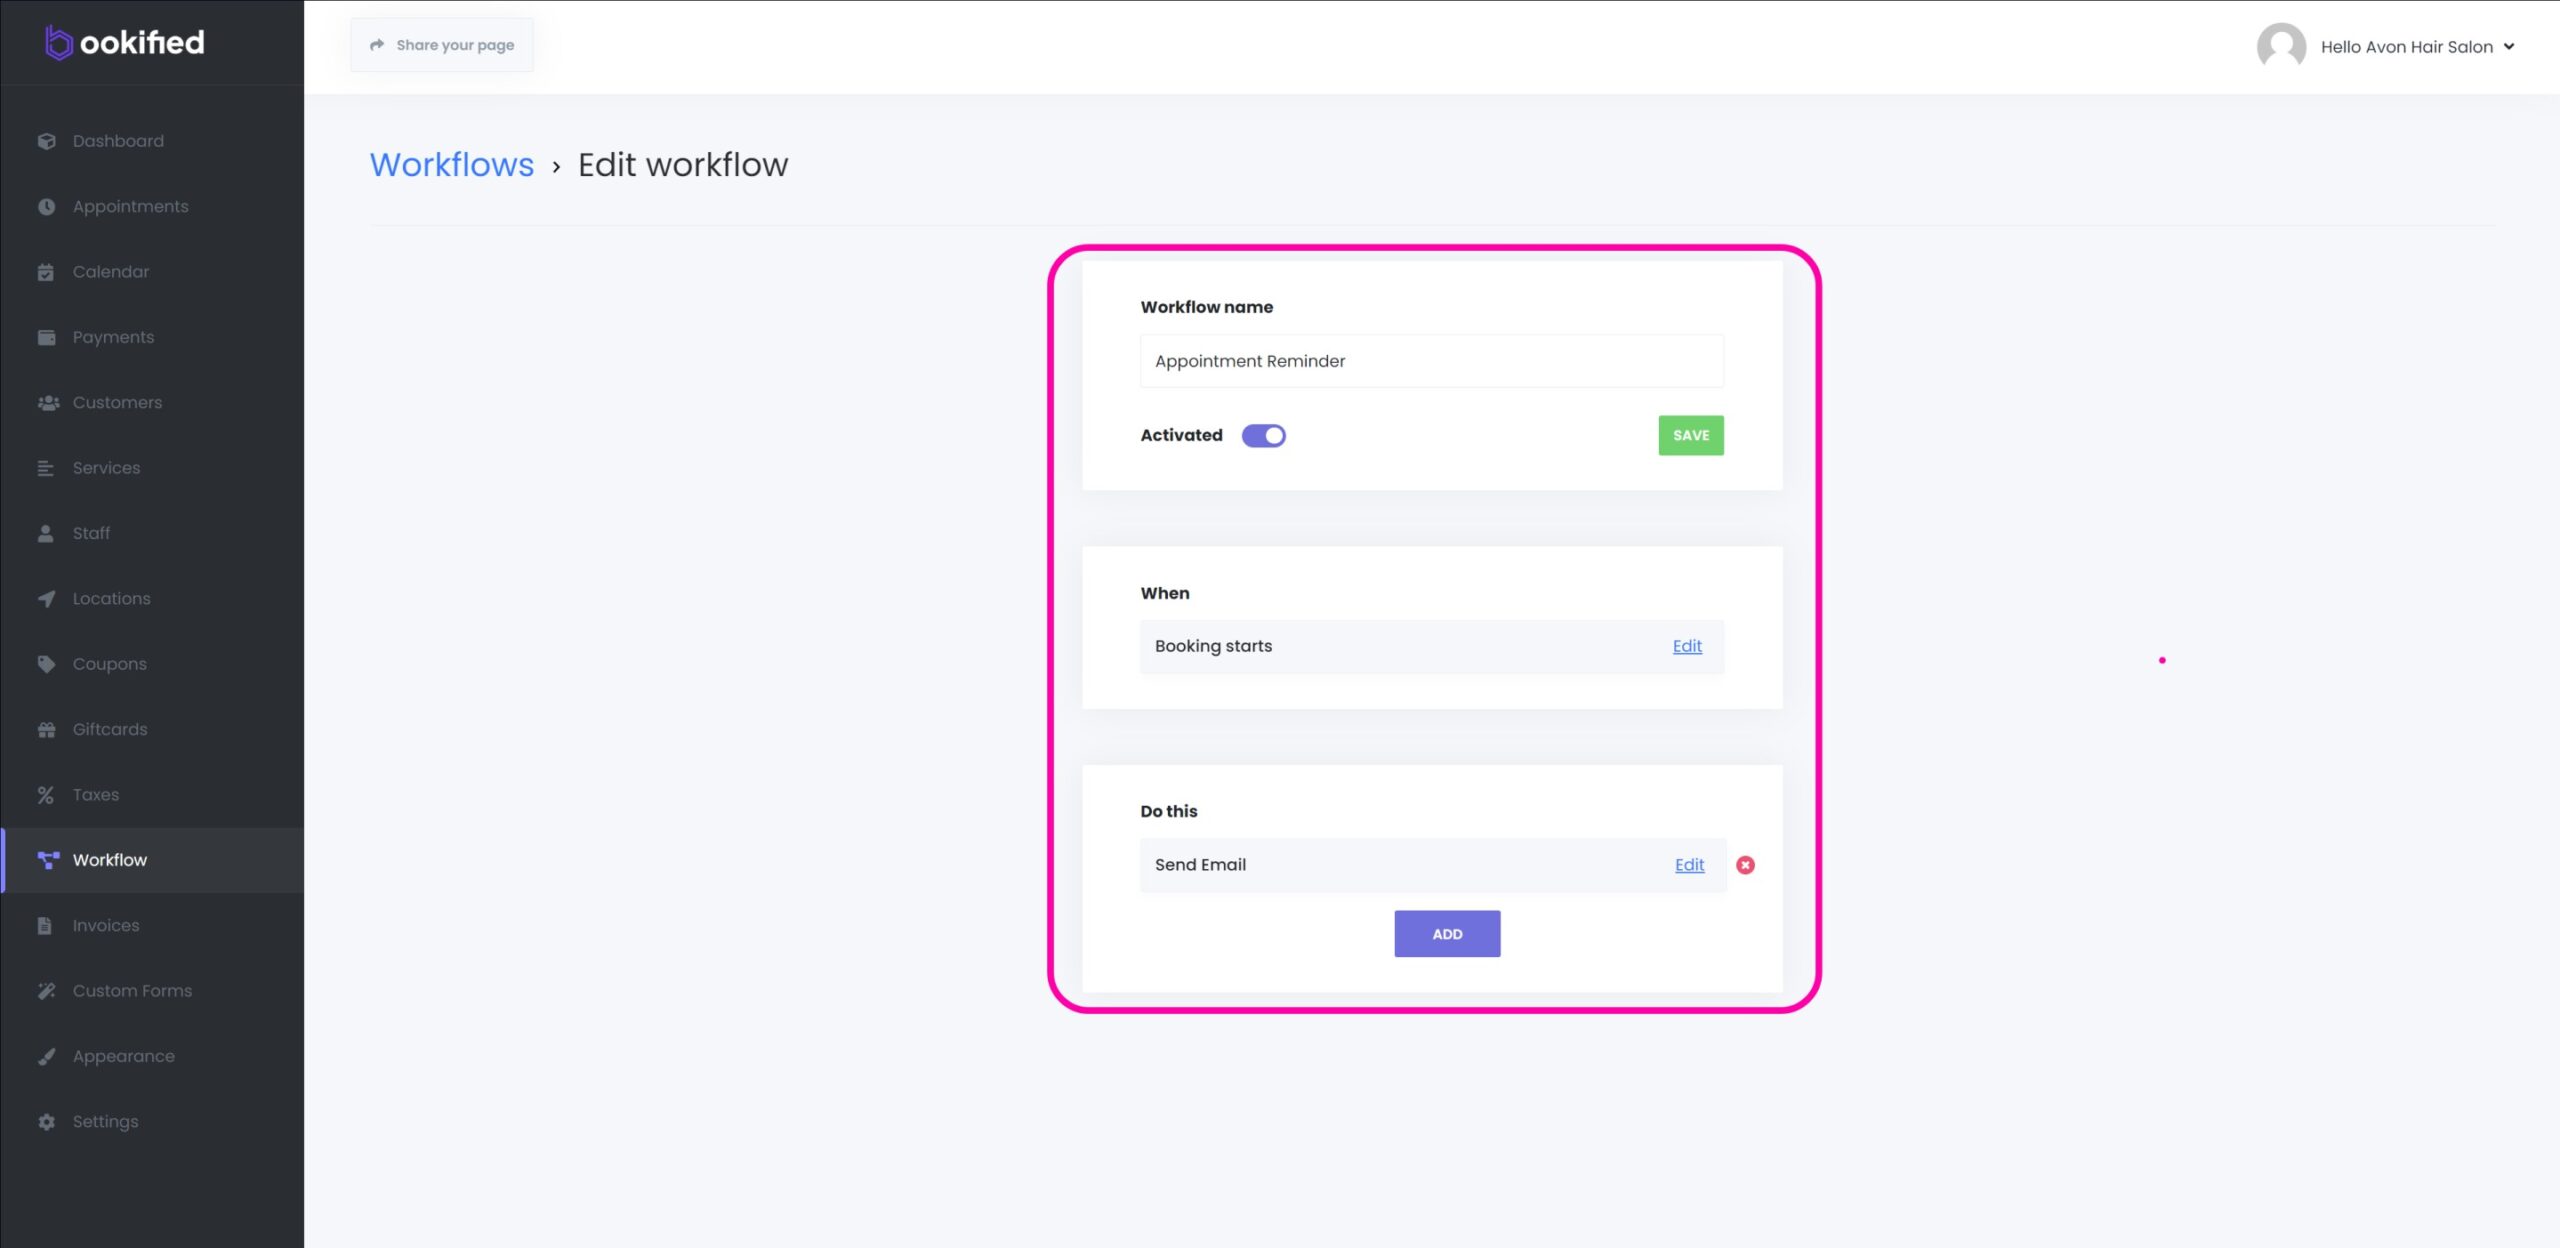
4. After clicking on the ‘create’ button, you will be redirected to the page of the workflow you just created. On this page, you’ll have the opportunity to further modify and fine-tune your workflow as needed. Below is an example of creating a basic appointment reminder that is sent via email 1 day before the appointment.
If you want to include multiple actions in your workflow, simply click on the ‘Add’ button located in the ‘Do this’ section. A popup will then appear, providing you with the option to add additional actions to your workflow. This feature allows for the creation of more complex and comprehensive automated processes, catering to a variety of scenarios and requirements.
Keywords act as data placeholders. The system is equipped with hundreds of such placeholders that automatically get replaced with relevant information. These placeholders can include a wide range of data, such as the appointment date, the customer’s name, the location of the appointment, and much more. The use of these Keywords allows for highly customized and dynamic communication, as they adapt to include specific details pertinent to each individual appointment or customer interaction, offering endless possibilities for personalization.
Editing a Workflow
-
To make changes to an existing action in your workflow, click on the ‘Edit’ link adjacent to the action you wish to modify. Following this, you will be directed to “Edit Workflow”. Here you can modify the options and settings relevant to that particular action, allowing you to adjust and fine-tune it as needed.

Deleting a Workflow
-
To delete a workflow, click on the ‘3 dots’ adjacent to the action you wish to remove and select delete.

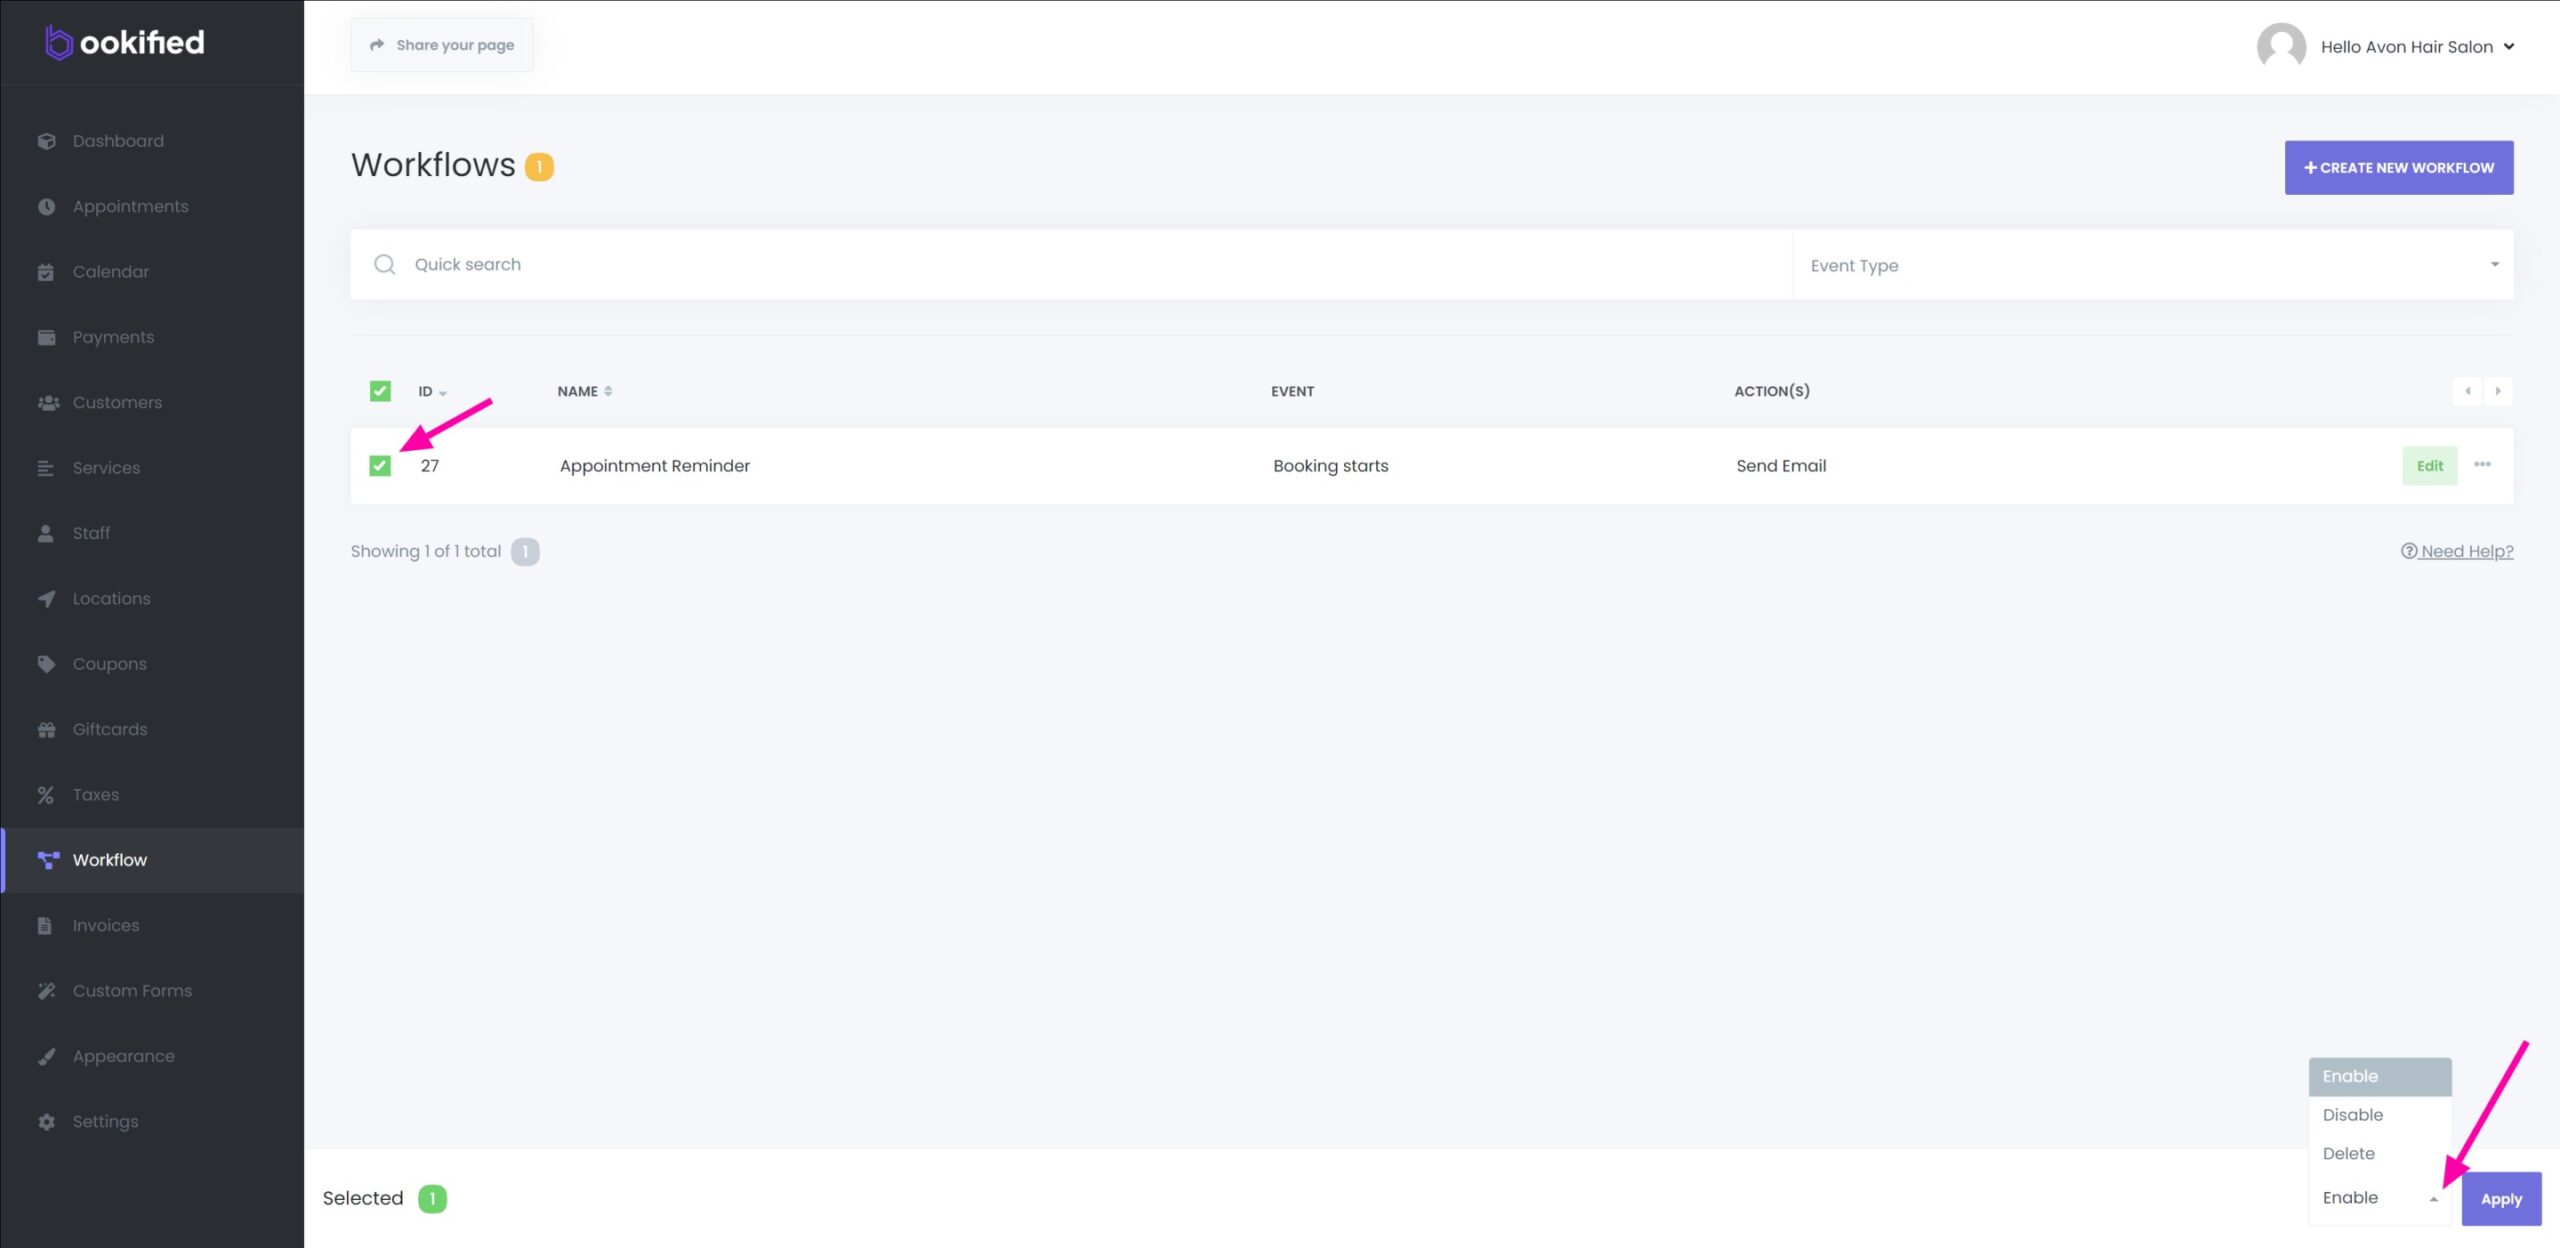
Disable/Enable a Workflow
-
You can disable or enable a workflow by marking the checkboxes next to the workflow name. This action will trigger a bottom banner to appear with multiple options.
For a practical demonstration of SMS or Email notifications, we invite you to explore the following resources:
SMS Notifications | Email Notifications
These examples will provide you with a comprehensive understanding of how these notifications function in real-world scenarios.