Customer Panel
This guide explains the benefits of using the customer panel feature, which allows clients to manage and modify their appointments. It emphasizes the convenience and engagement it brings to customers by enabling them to create and update their profiles. The guide also highlights the specific functions of the customer panel, such as rescheduling, canceling appointments, and deleting accounts. Overall, this guide is a useful resource for anyone seeking to enhance their customers’ experience and engagement with their service.
Customer Panel URL
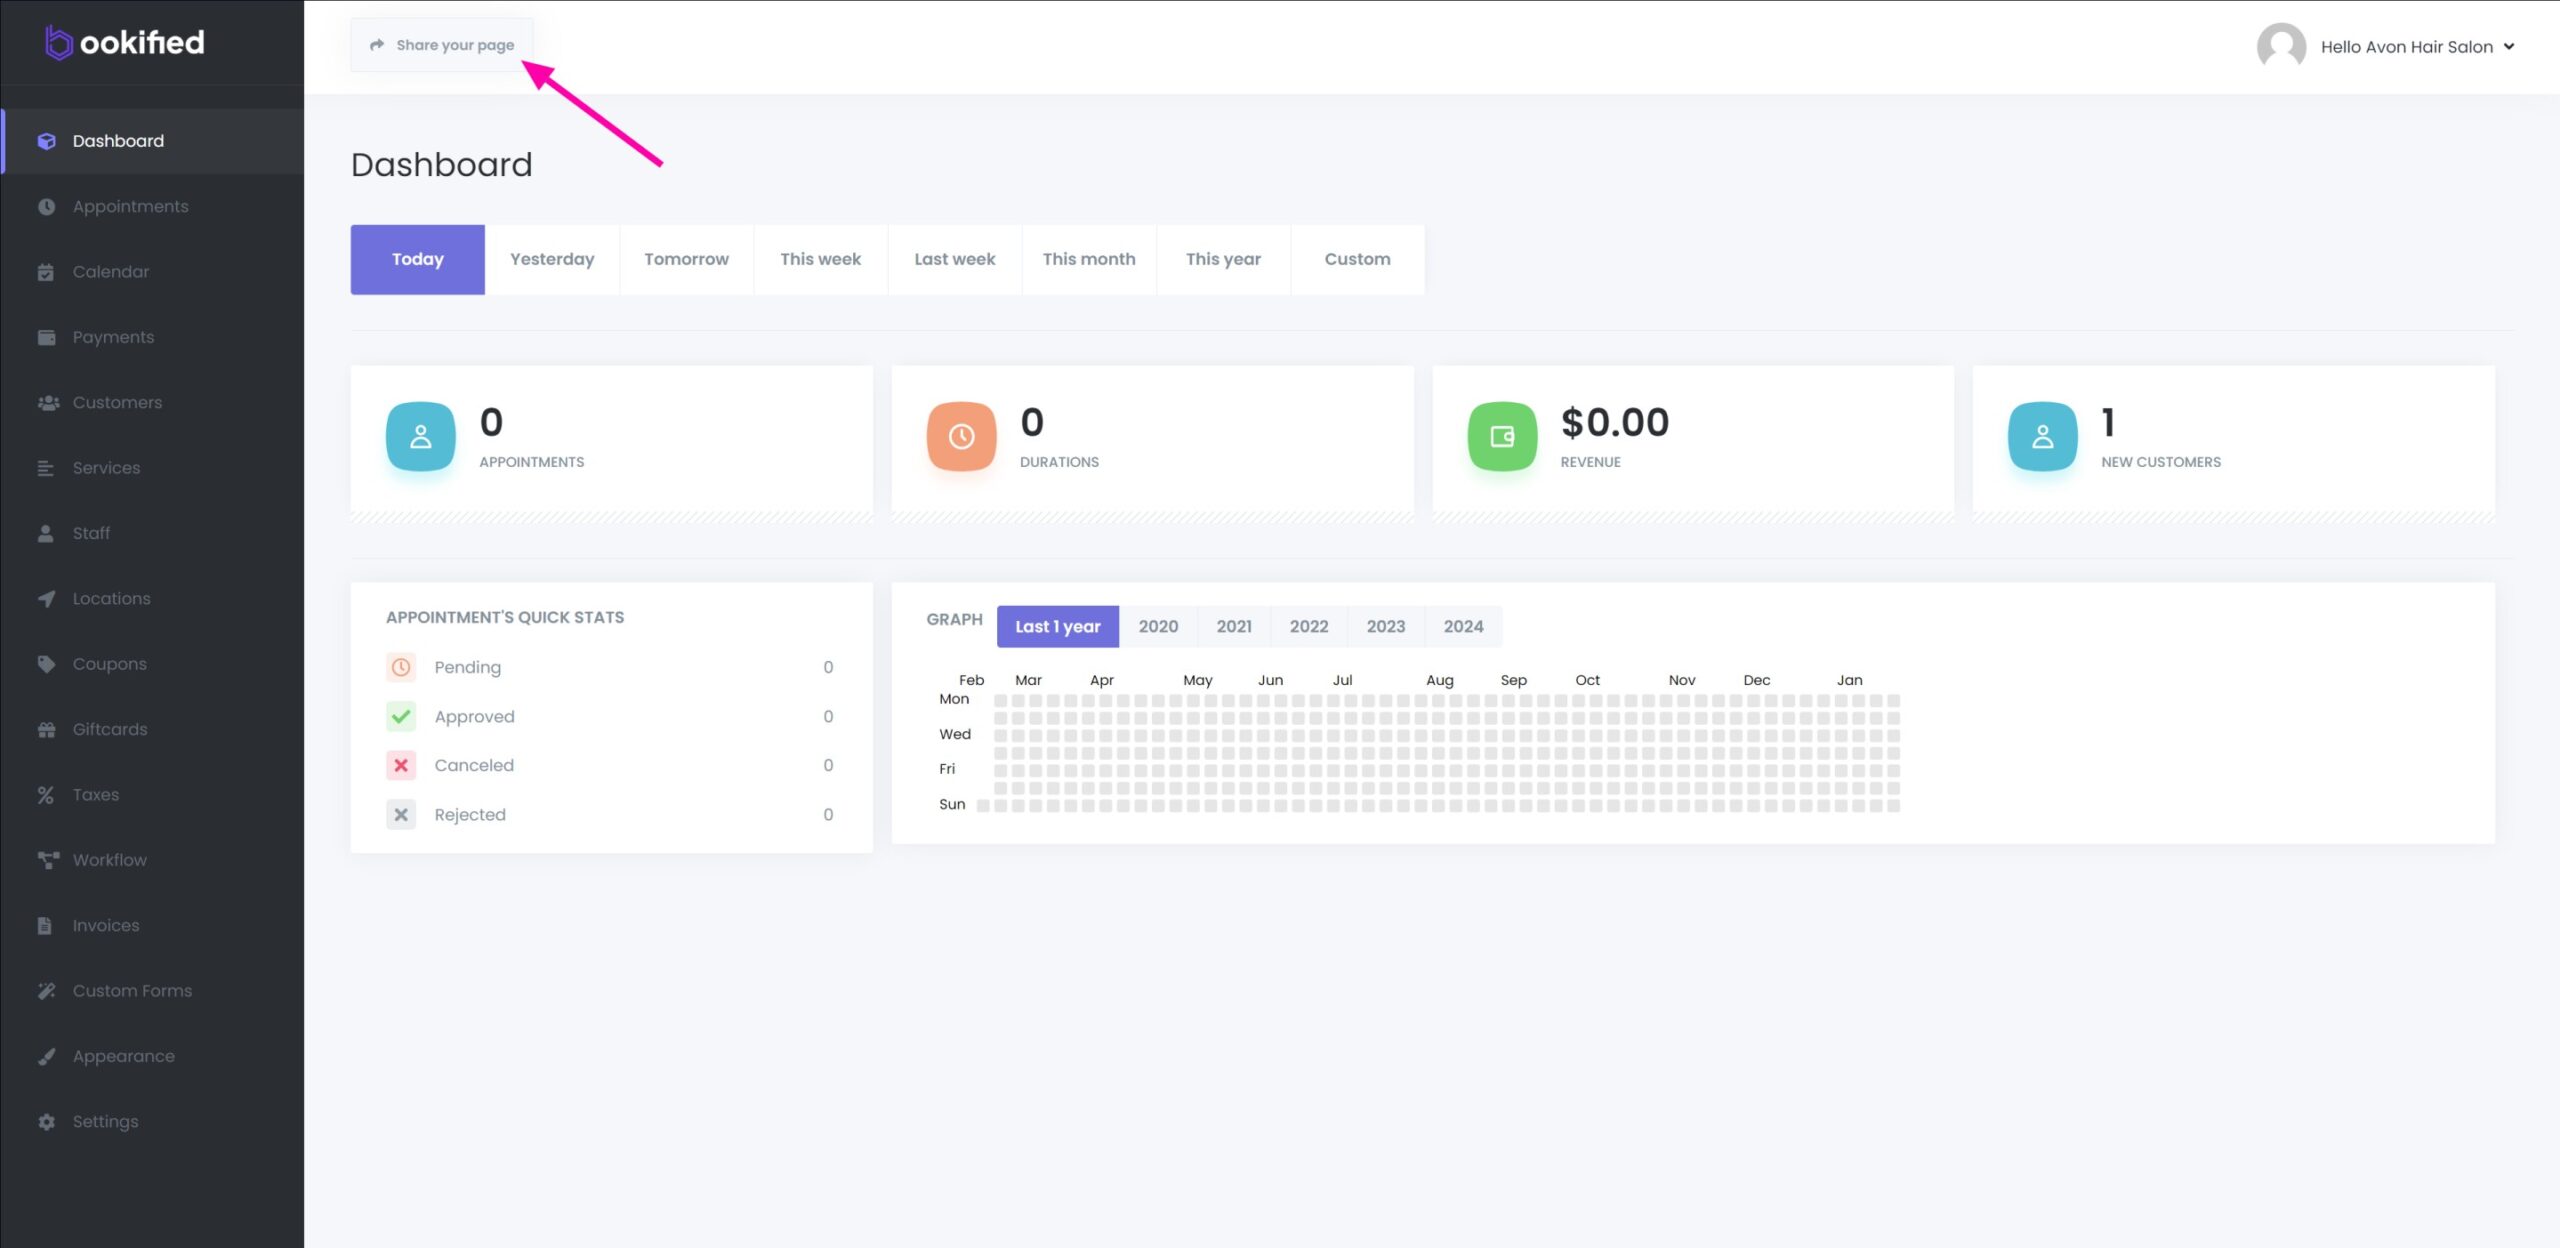
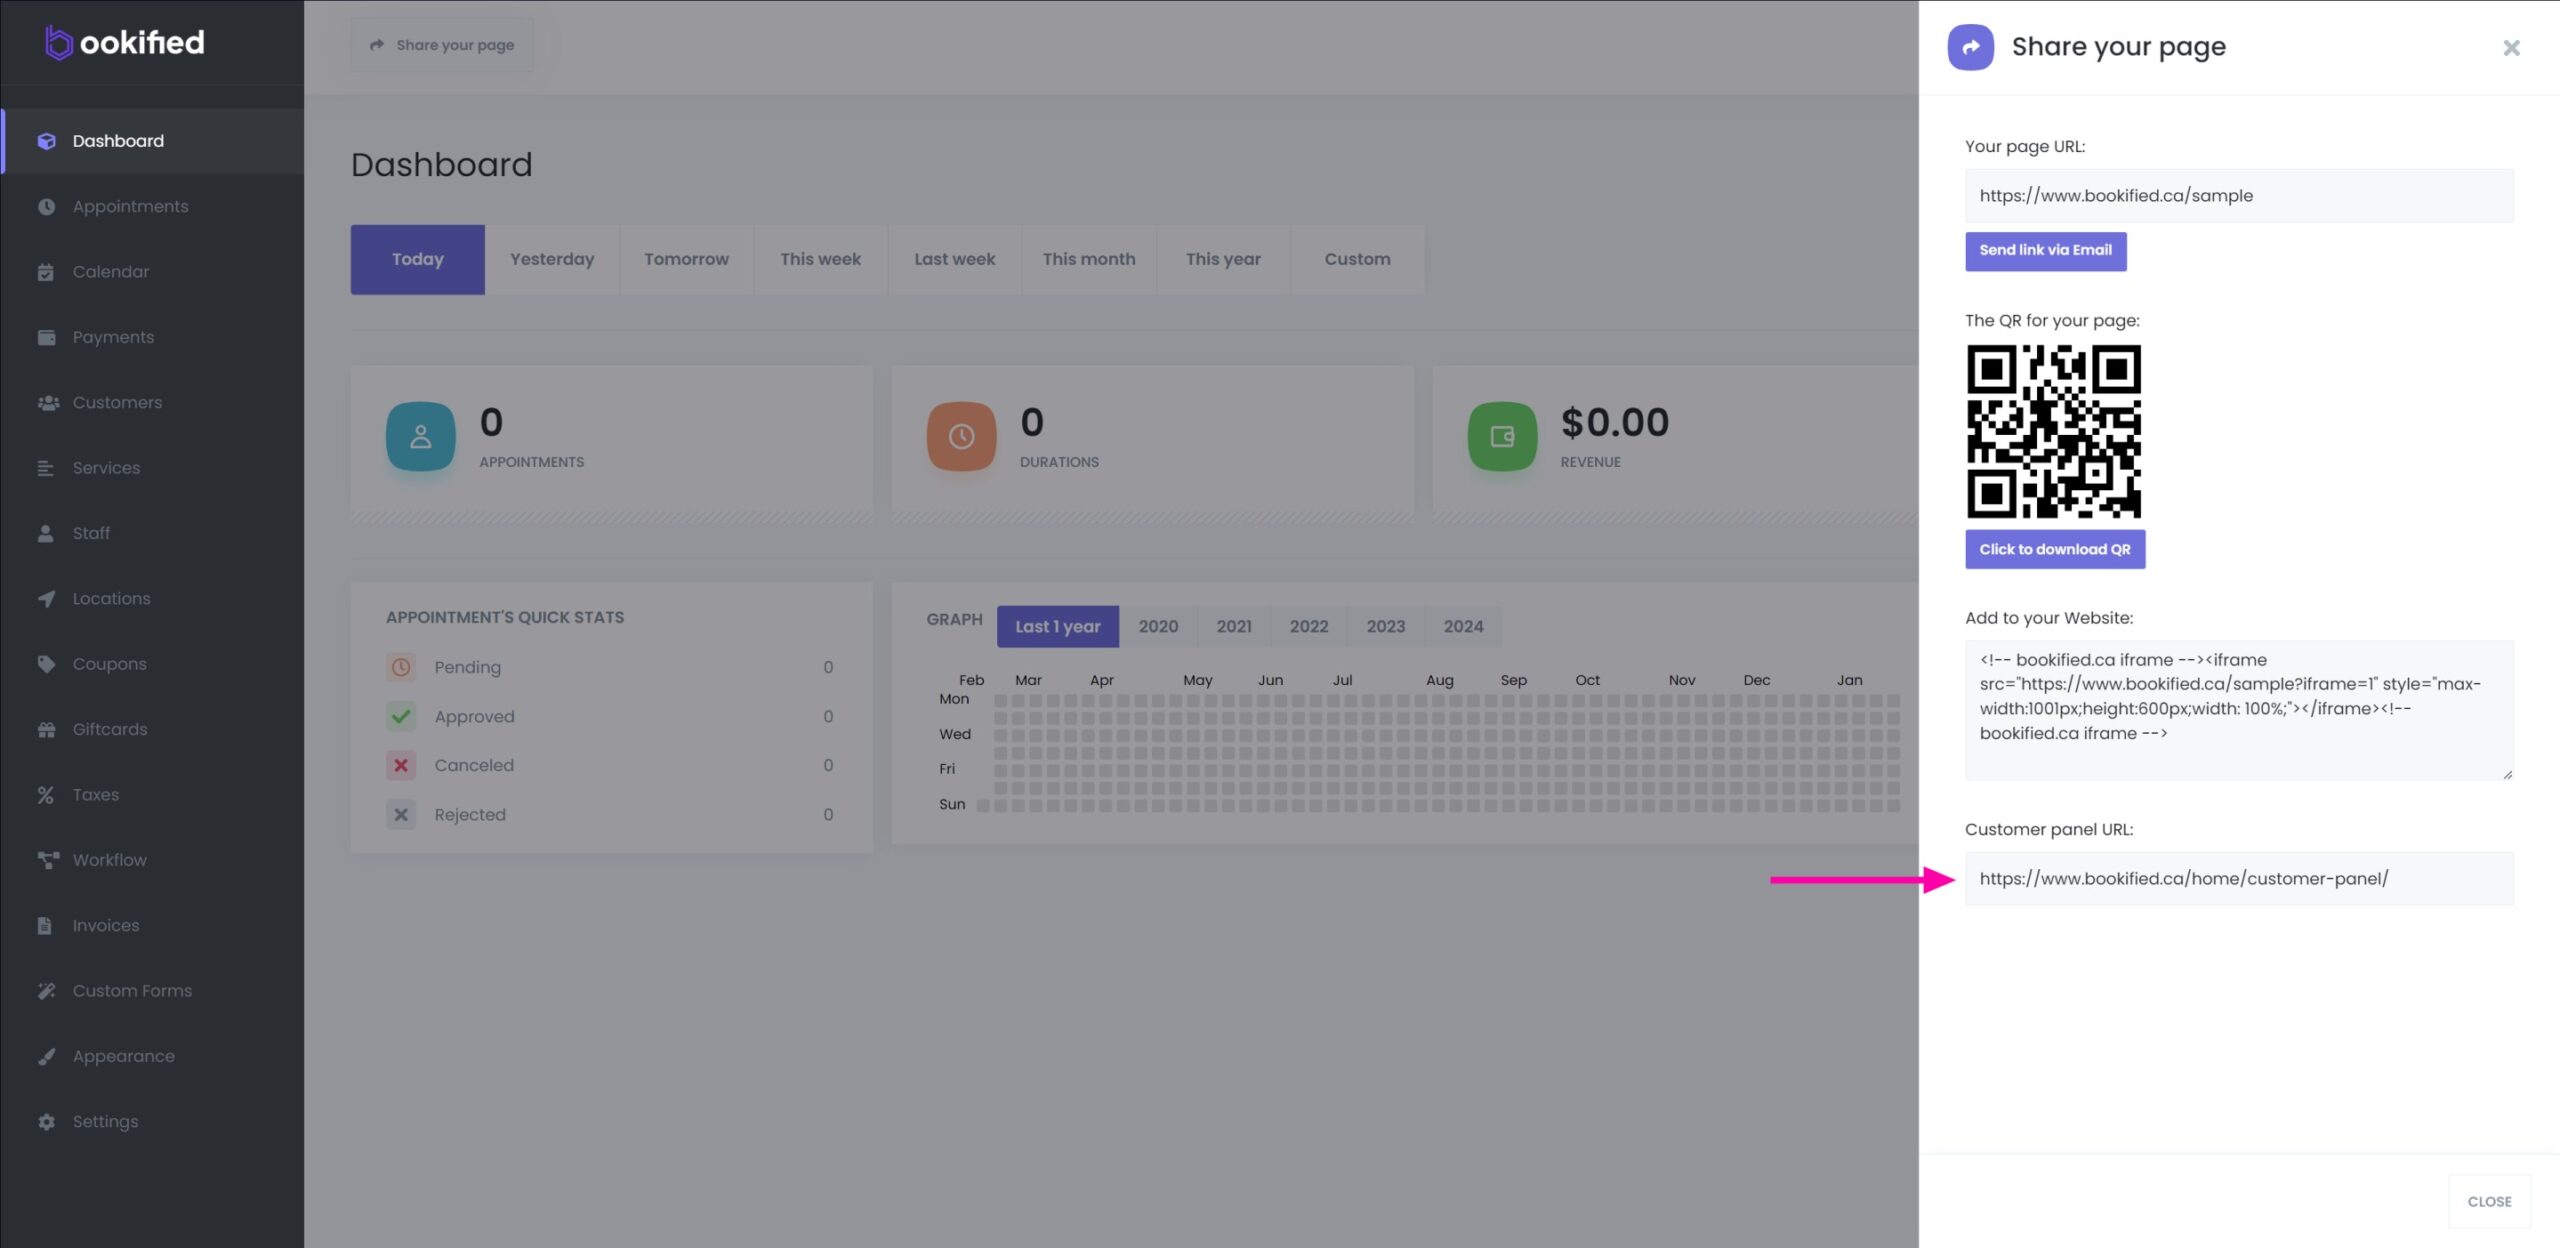
- To get your customer panel link, click on the ‘Share your page’ button located at the top left.
Allowing Customers to Reschedule or Cancel Appointments
- To allow customers to cancel or reschedule their appointments from within the customer panel, follow the steps below.
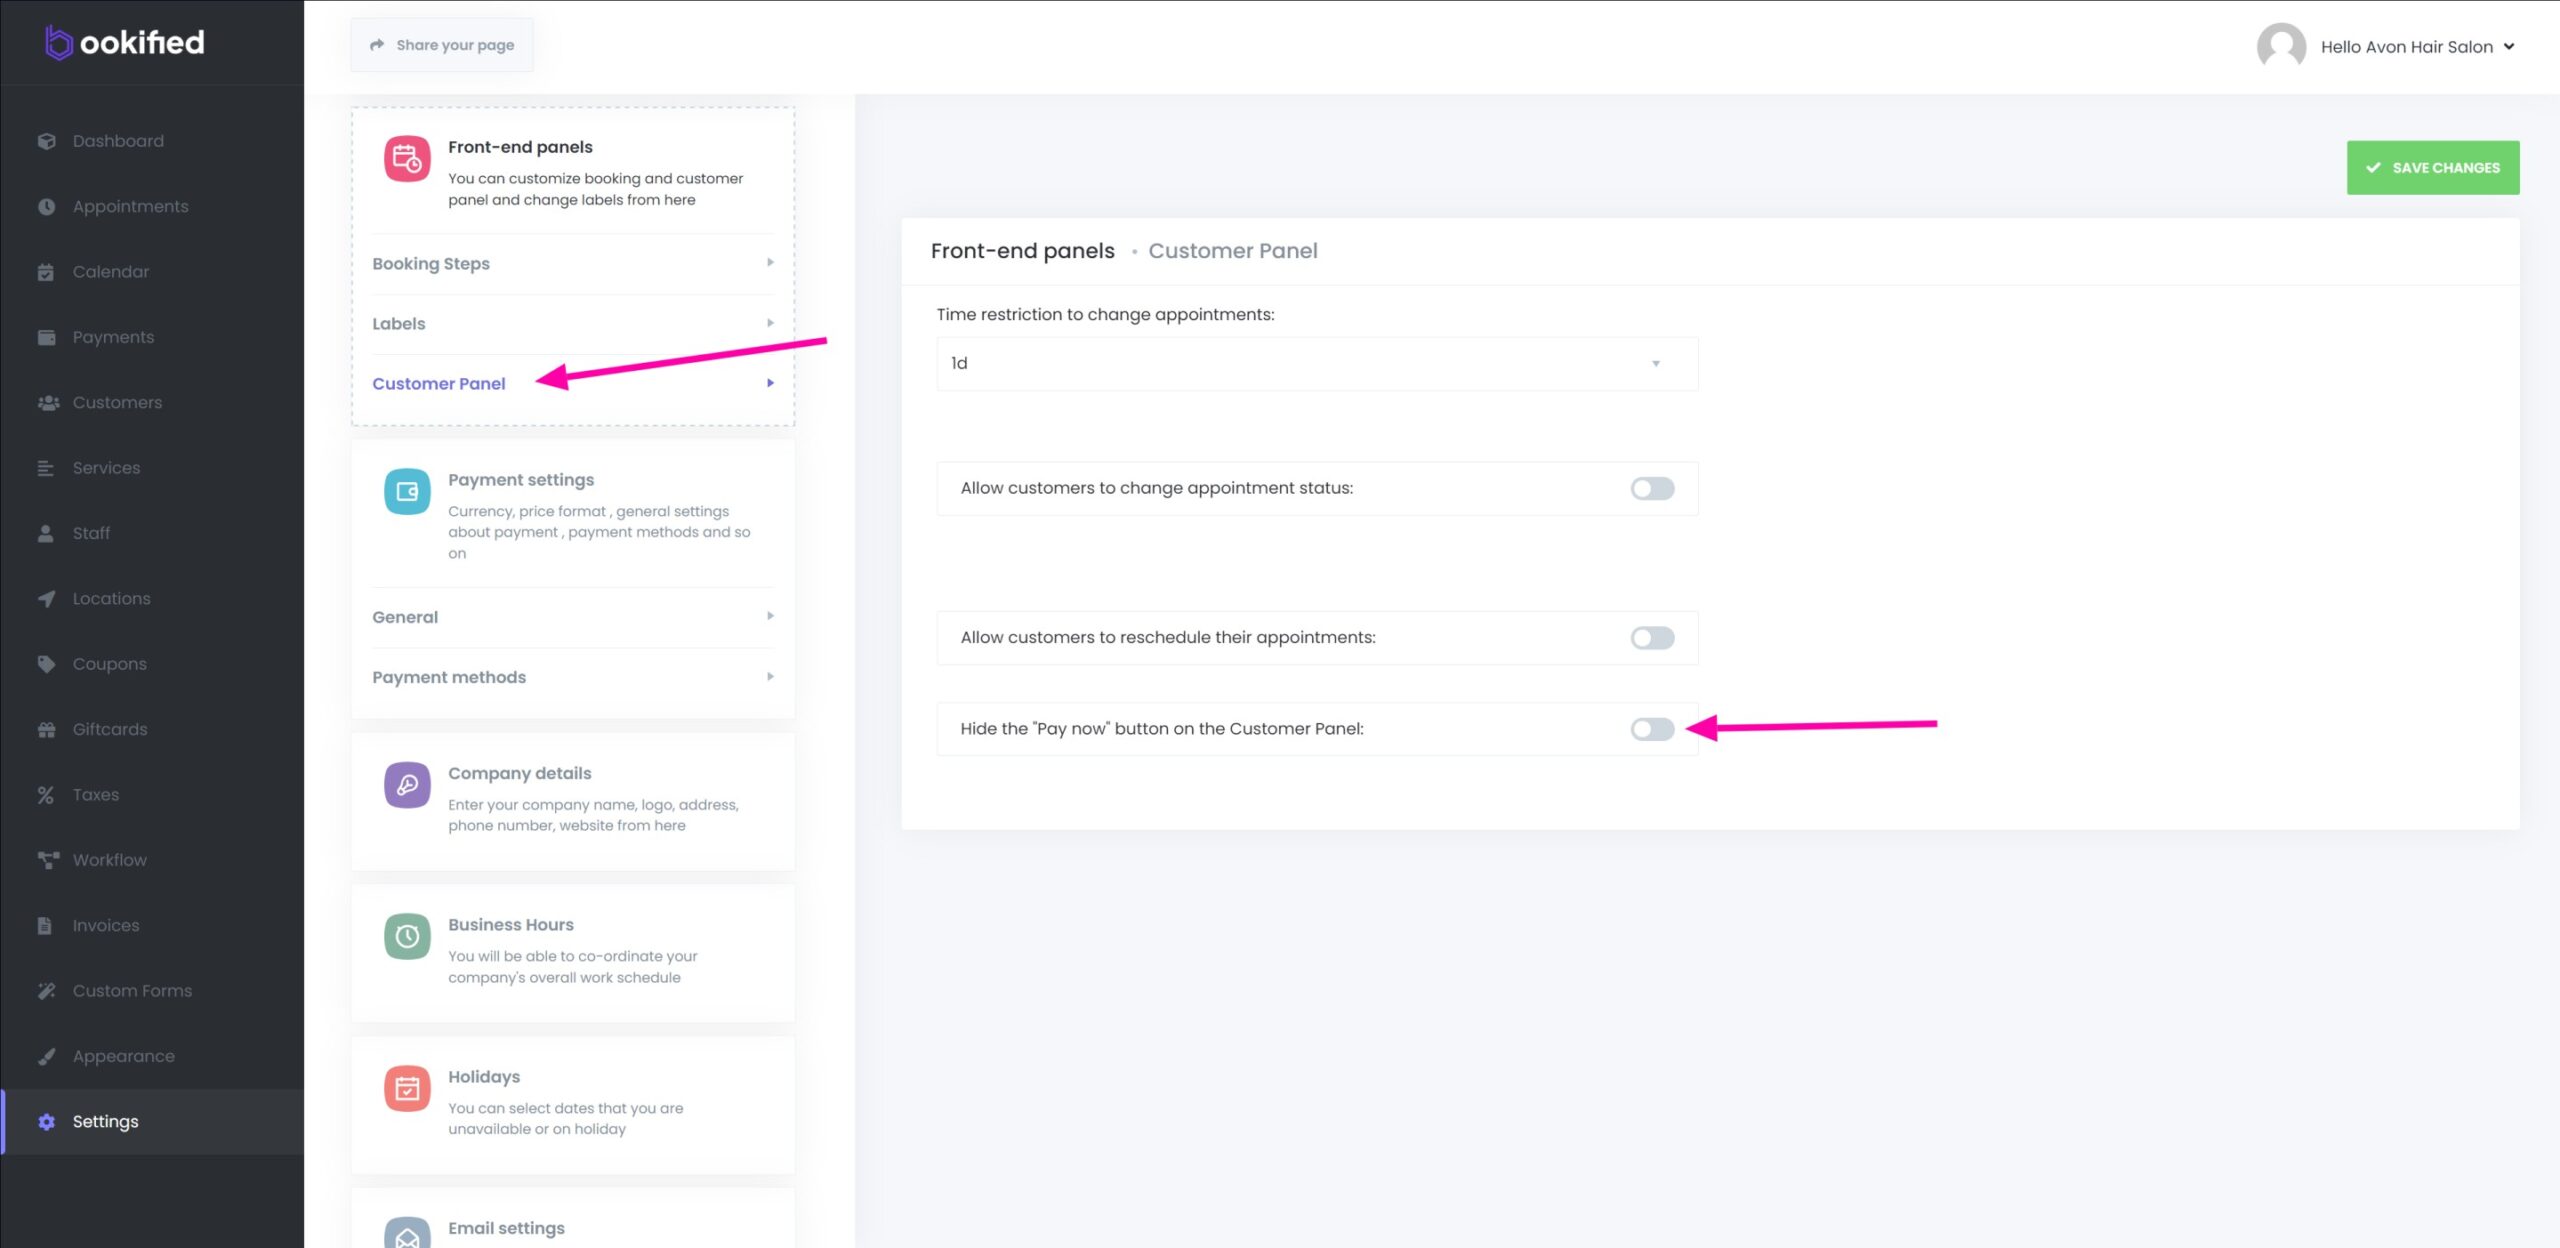
1. Select the ‘Settings‘ menu
2. Select ‘Front-end panels‘
3. Select ‘Customer Panel‘
4. Enable ‘Allow customers to change appointment status‘ and/or ‘Allow customers to reschedule their appointments‘
5. Set your desired Status for each one
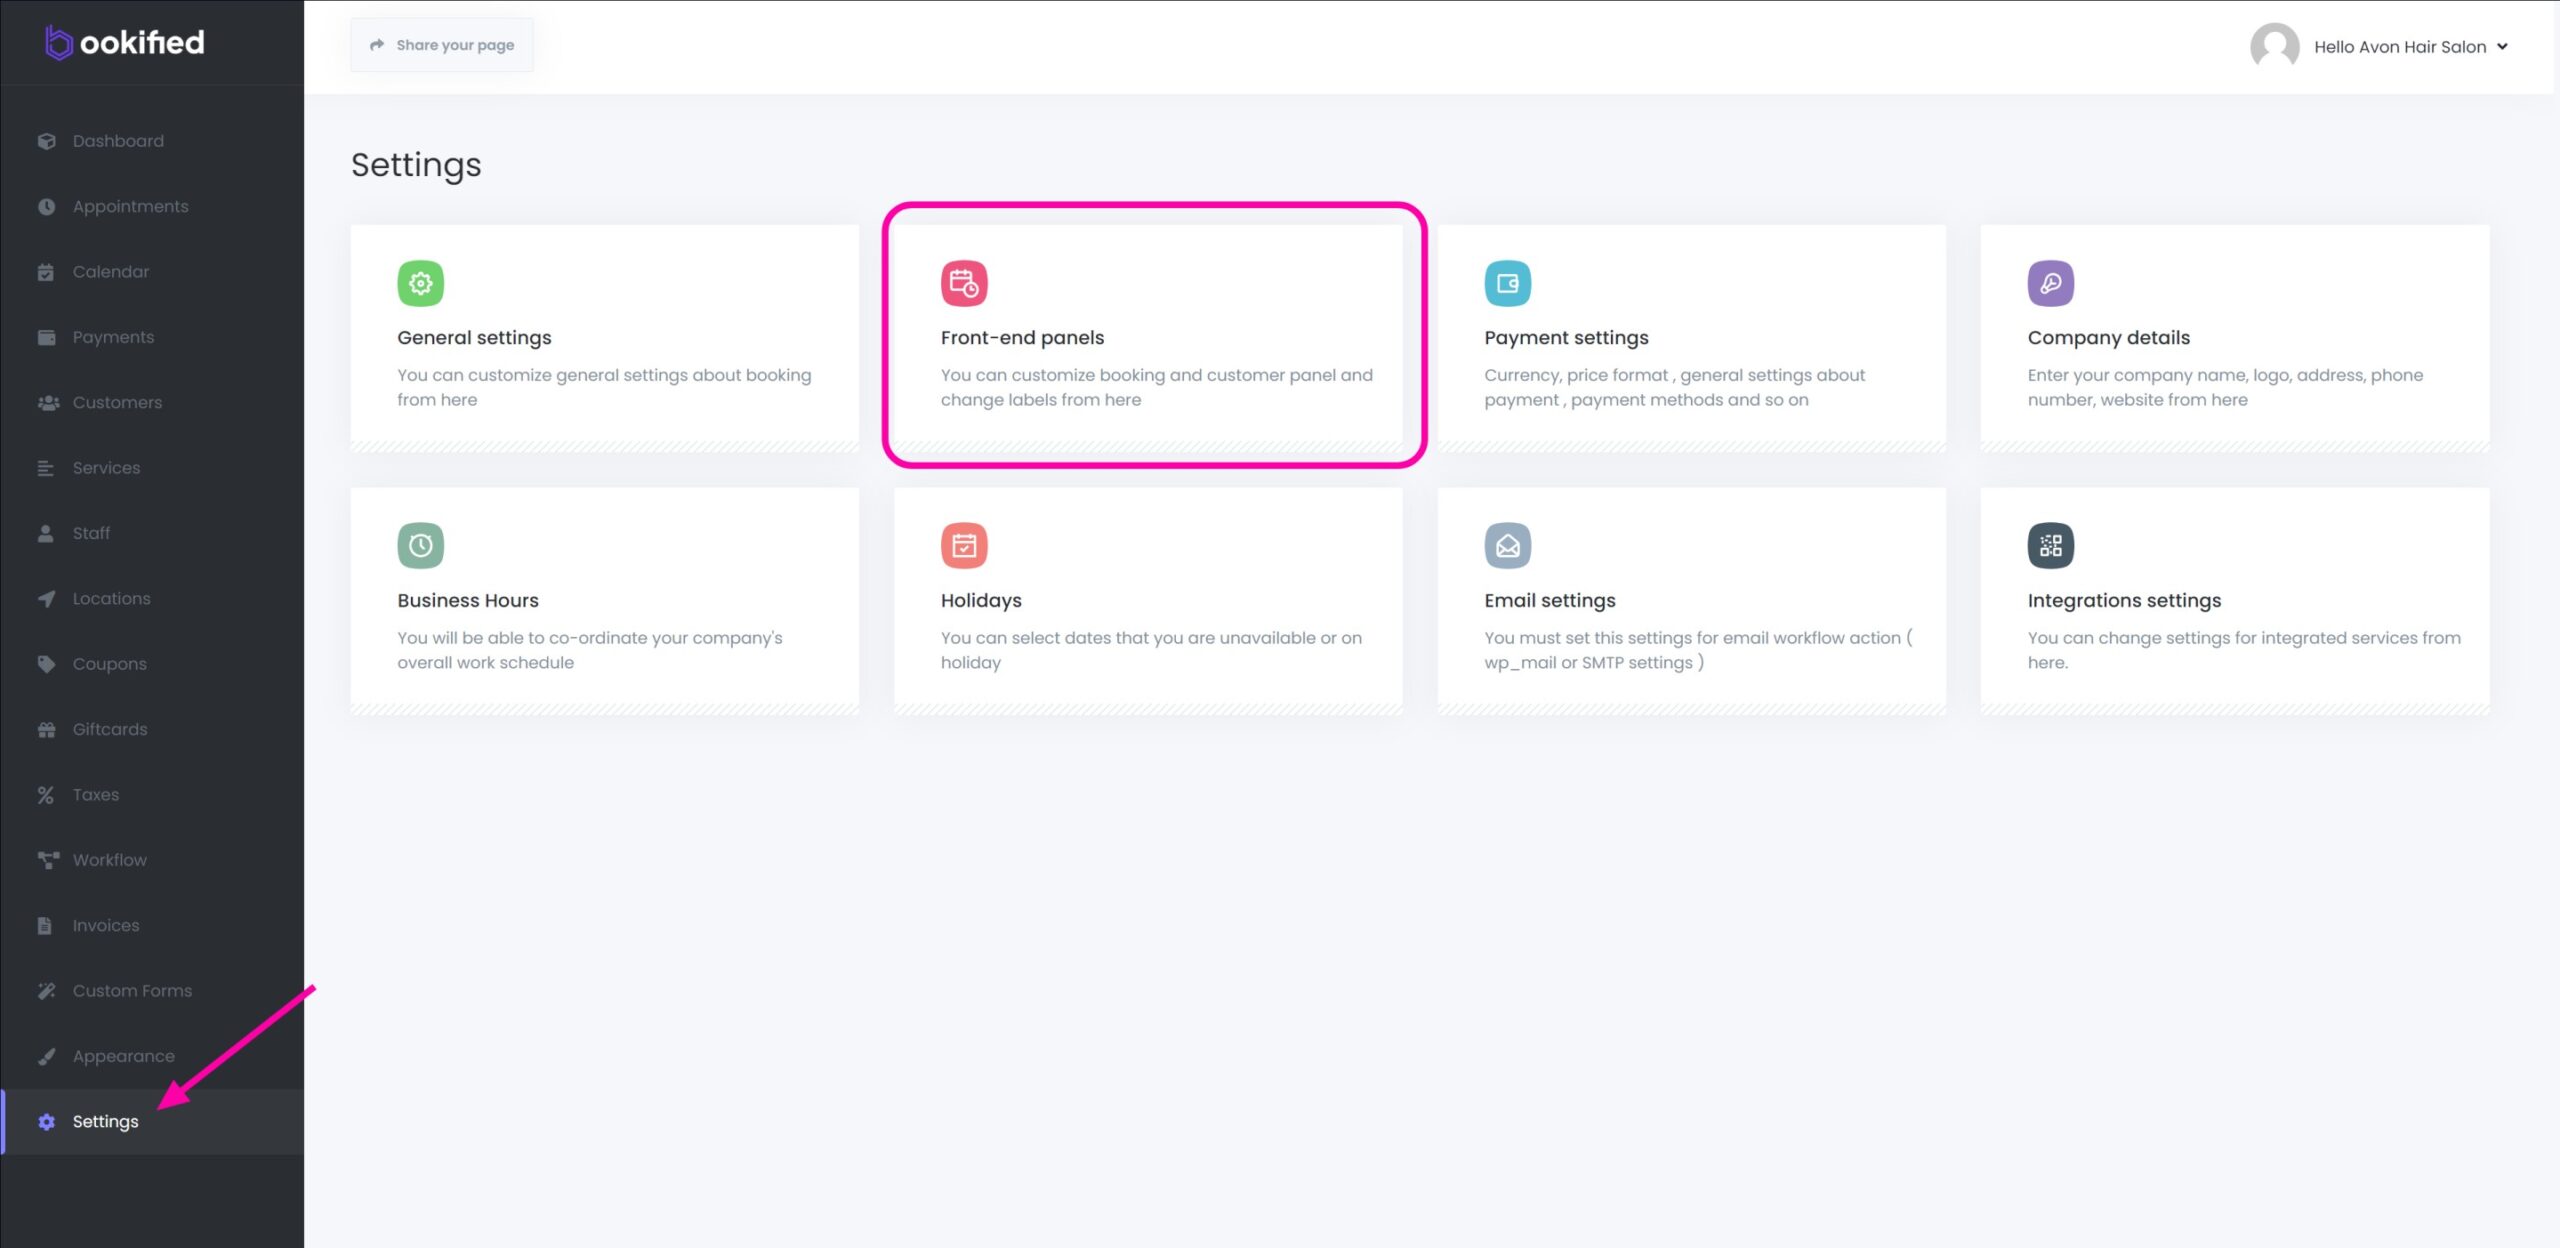
The ‘Allow customers to change appointment status’ feature enables customers to modify their appointment status based on the options you set in the field. You can set multiple statuses. While ‘Canceled’ is the recommended status, the choice depends on your business needs. If you set the status to ‘Canceled’, it will allow the customer to cancel the appointment, if you set the status to ‘Approved’, it will allow the customer to change a ‘Canceled’, ‘Pending’, or ‘Rejected’ status to ‘Approved’.
The ‘Allow customers to reschedule their appointments’ feature enables customers to reschedule their appointment(s) based on the options you set in the field. For instance, if you set the field to ‘Approved’, it will only allow customers with an ‘Approved’ status to reschedule their appointment. This means that only customers with approved appointments can reschedule. You can set multiple options for this field as well.
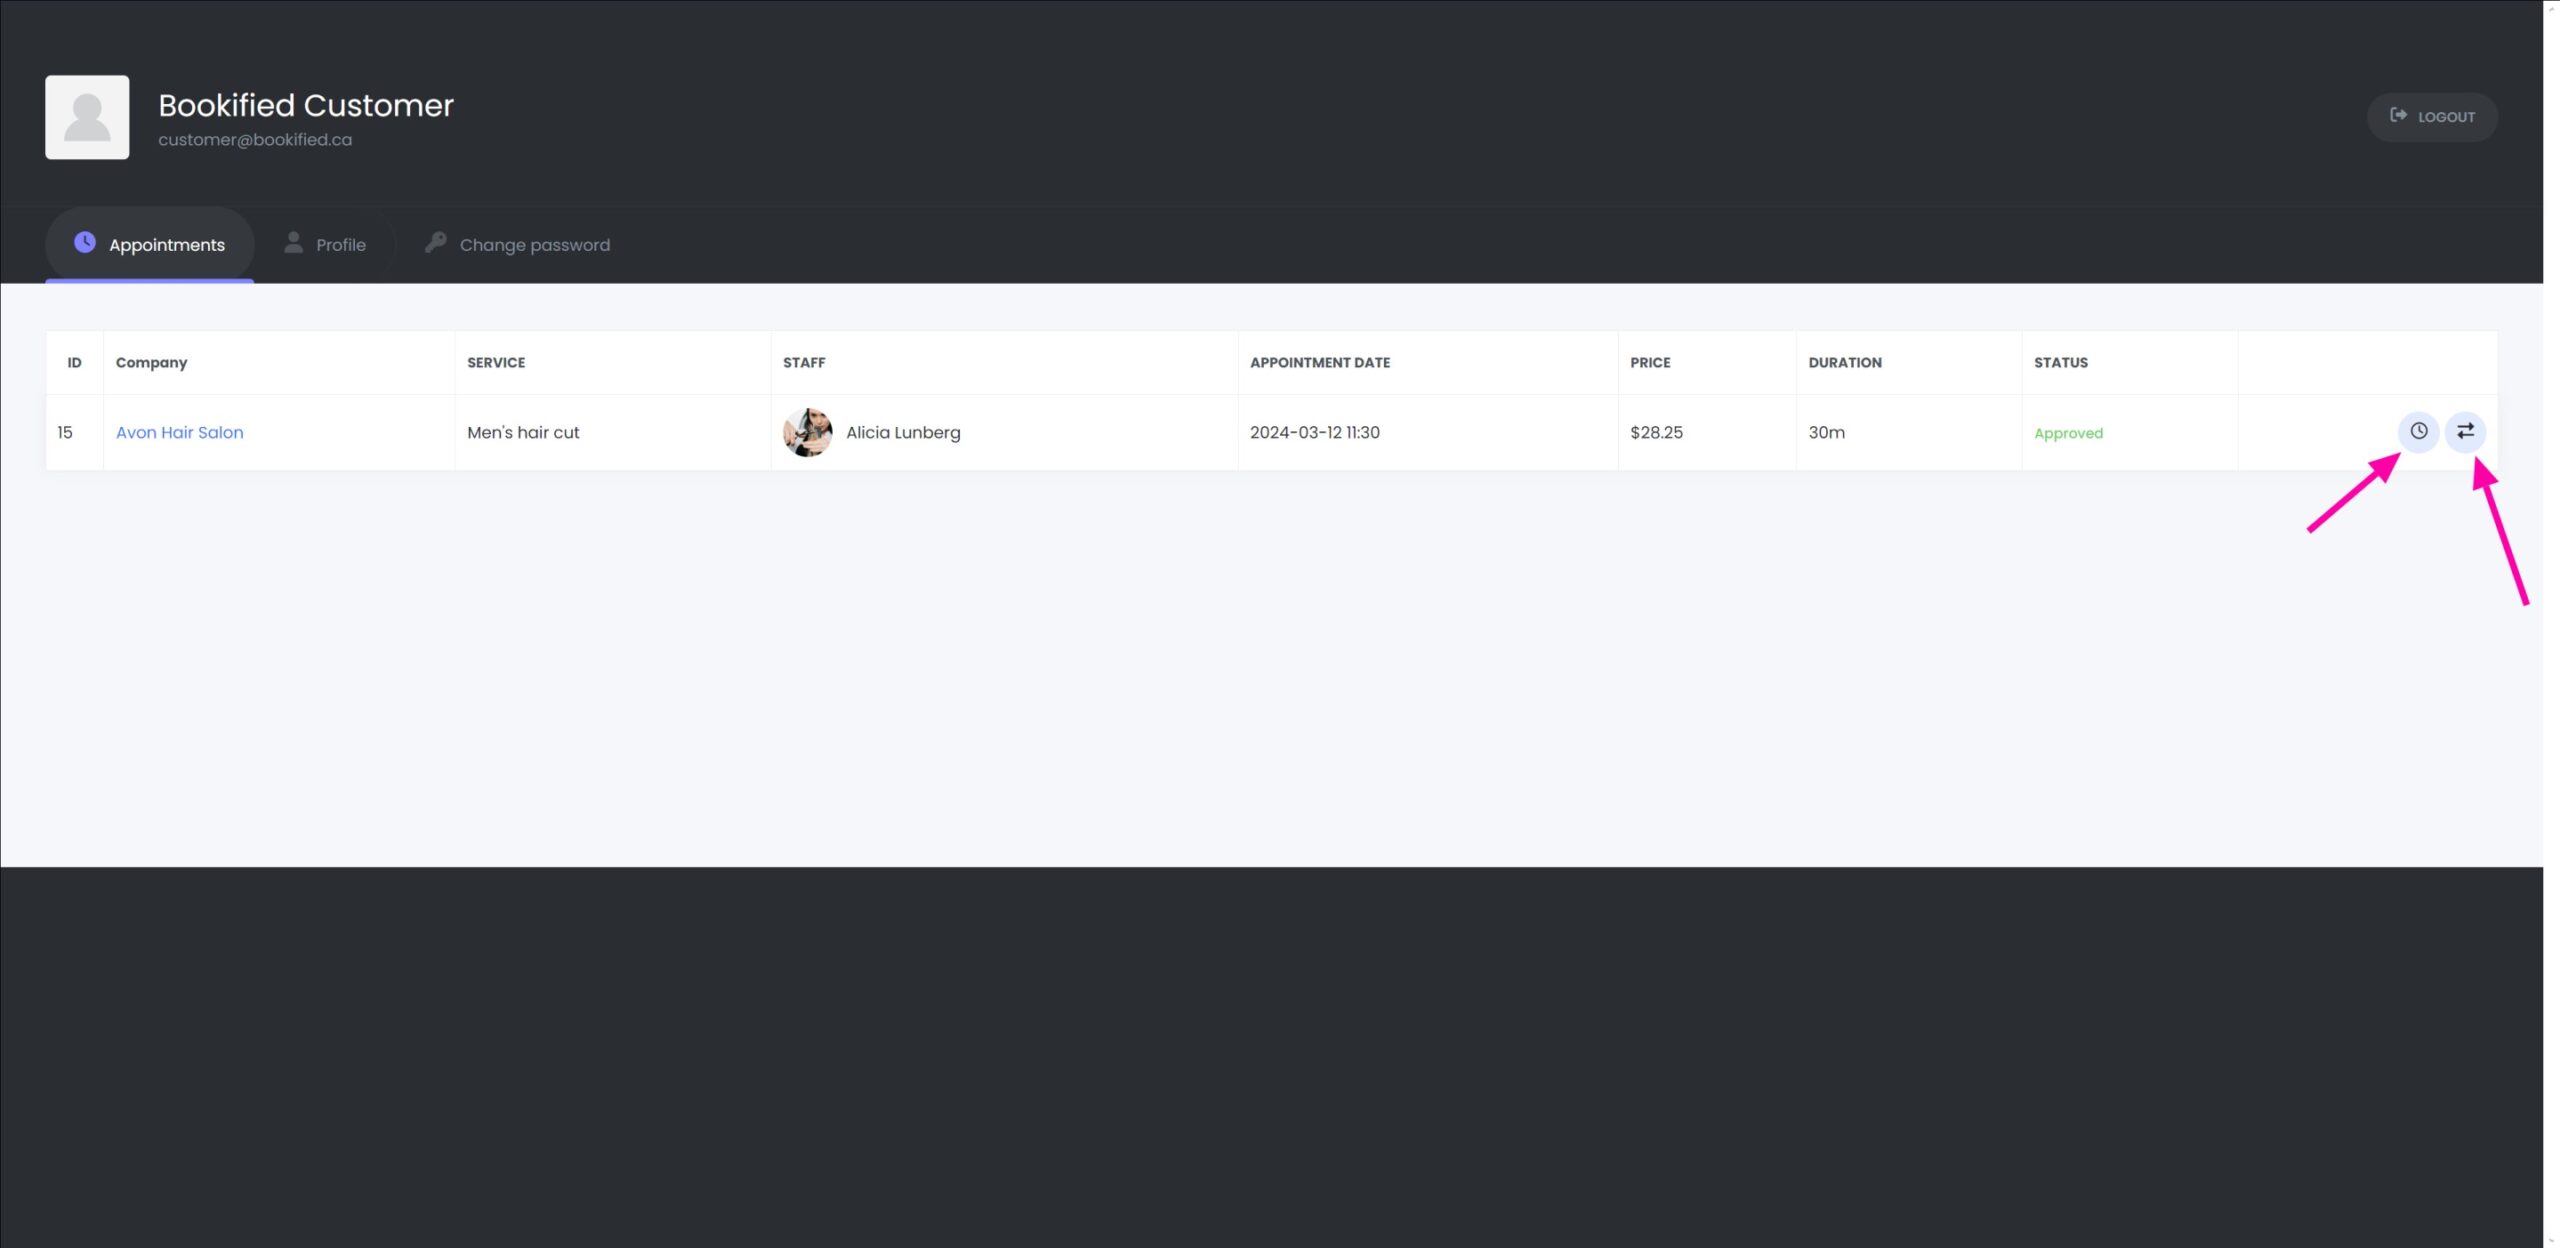
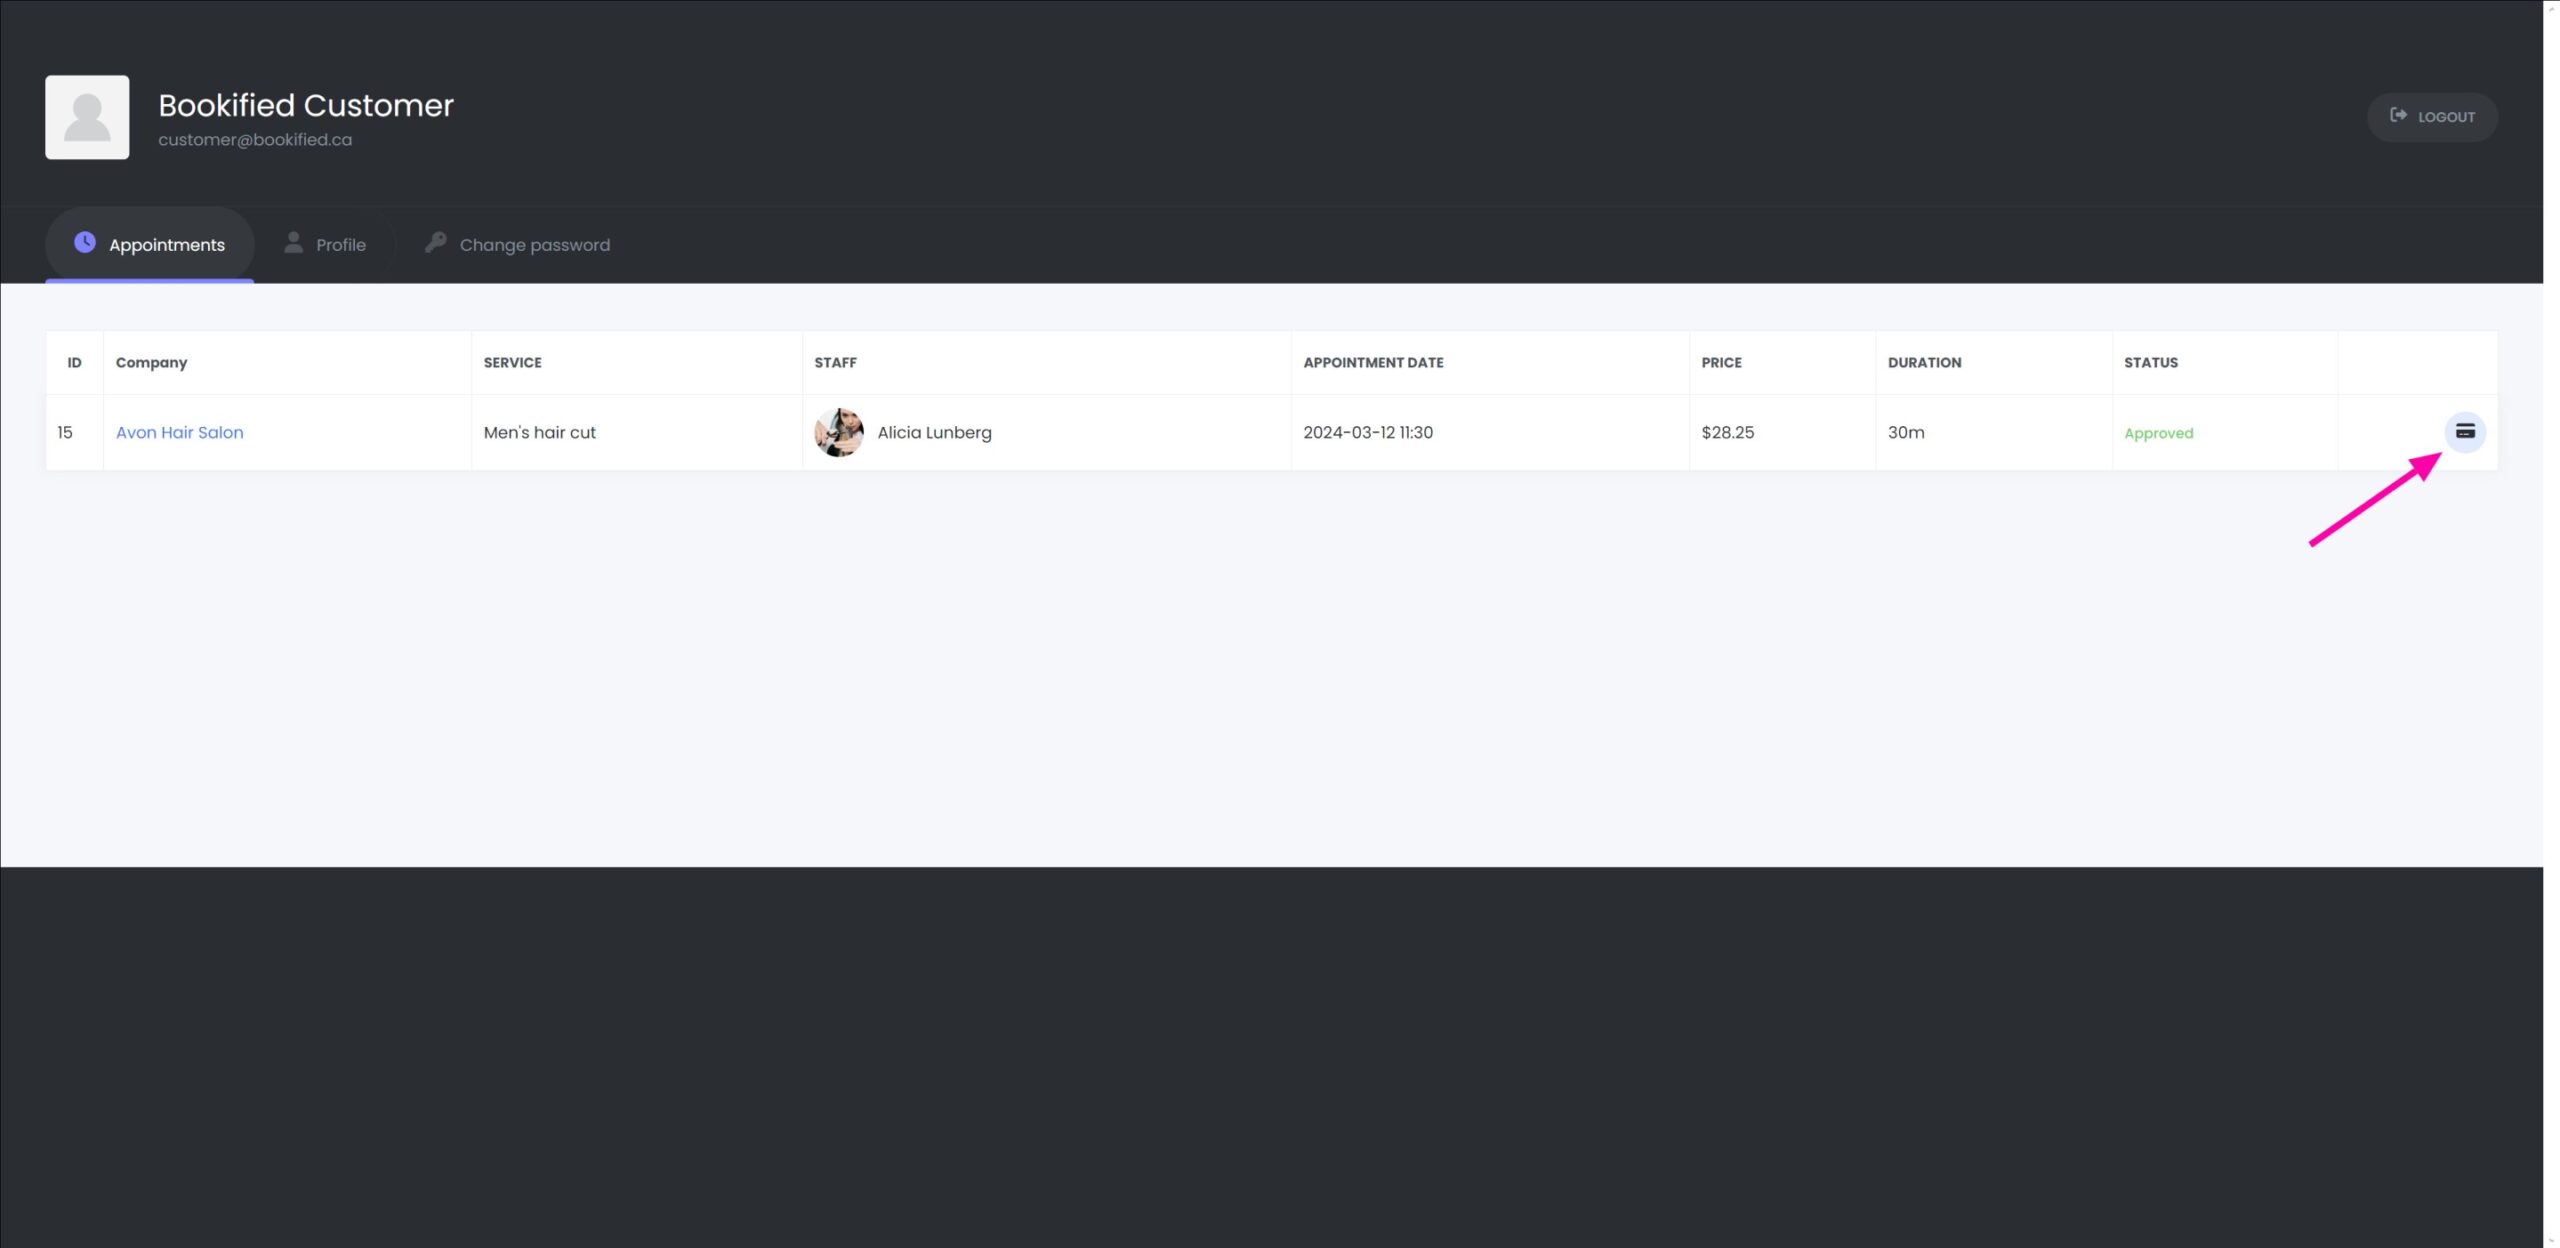
When Both Options are Selected
- Left clock icon is for rescheduling the appointment
- Right arrow icon is for changing the appointment status
Enable/Disable Pay Now on Customer Panel
- Depending on your business needs, you may choose to allow or disallow customers to pay their invoice directly from the customer panel. The choice is yours. Please note that this option is enabled by default.
1. Select the ‘Settings‘ menu
2. Select ‘Front-end panels‘
3. Select ‘Customer Panel‘
4. Enable or Disable ‘Hide the “Pay now” button on the Customer Panel‘
When ‘Pay Now’ is Not Hidden
Customer-Managed Profile Updates and Password Changes
- In the ‘Customer Panel’, customers have the autonomy to manage their own profiles. This includes the ability to update personal details and change passwords at their convenience. In addition, customers also have the option to delete their account if they choose to do so. This self-service approach empowers customers by giving them control over their own information and account settings.
The ‘Customer Panel’ can be accessed from the Booking Panel by clicking on the ‘My Account’ link. Alternatively, it can be accessed directly by entering the specific URL in your browser.